These pumpkin cakes are moist, delicious, and easy to make. Warning: the salted brown butter maple icing is highly addictive!
So my daughter started school, and one of the fun things that parents get to do is volunteer to bring in various treats (or napkins, tablecloths, toys, etc.). Obviously, I was going to do the treats! I love making treats (see some of my other other dessert creations!) and getting to have one or two all to myself, and the rest out of the house for someone else to enjoy.
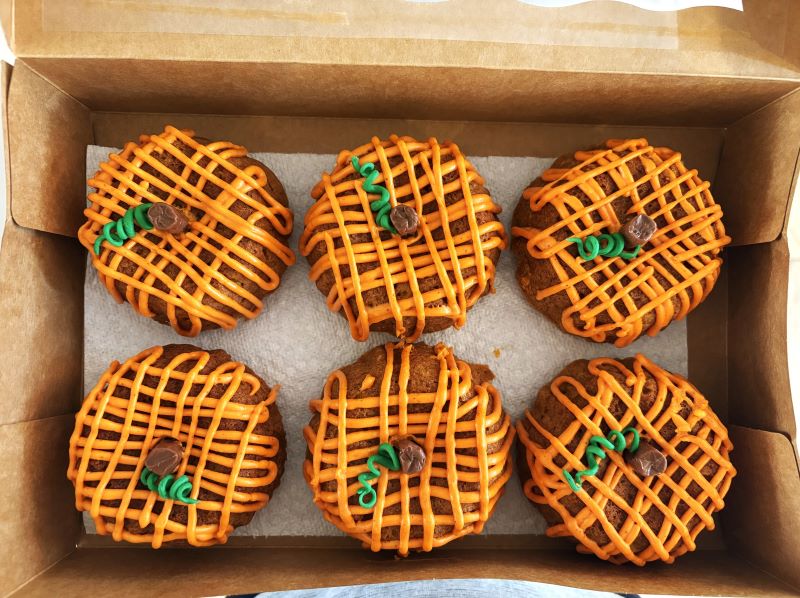
So I volunteered to make mini pumpkin bundt cakes for the twenty or so kids in my daughter’s class. It was such a fun project! And it did take up a lot of the morning, but I was surprised at how quickly it went.
I was very happy with how these turned out, so I wanted to share. I think it would make an amazing holiday (Halloween, Thanksgiving, or Christmas) treat! And it’s really not difficult to do.
Fall Pumpkin Flavors
The pumpkin cake base is a really delicious and moist spiced pumpkin cake from the NYT. I’ve kept this recipe pretty consistent with that recipe (which is for a large bundt cake), but with some changes to the baking time and icing.
The salted brown butter maple icing just brings it to the next level of deliciousness. It is quite a sweet icing, so for my husband (who doesn’t love super sweet flavors), I reduced the sugar a bit and kept the drizzle of icing to a minimum. A finishing touch to the cake, but not a key player. For me, I was all about the icing, so I took a different approach (see the picture below).
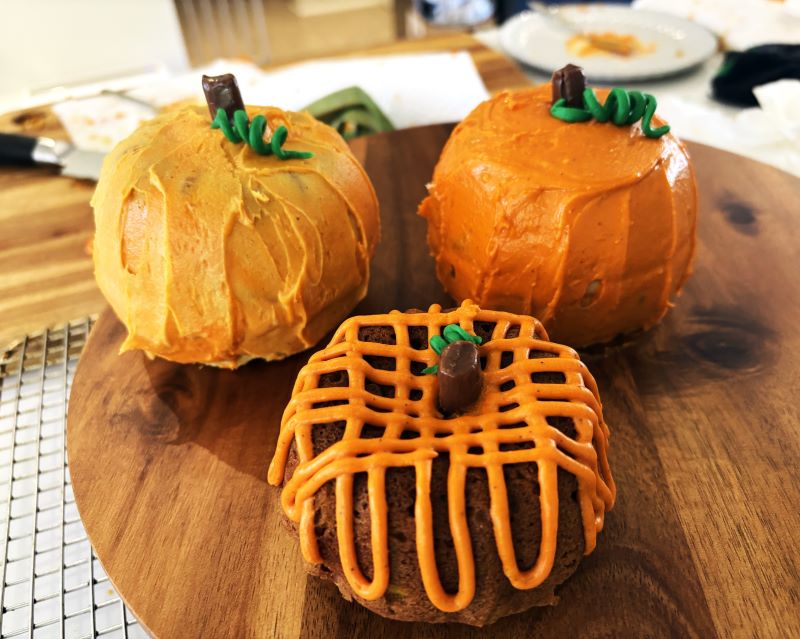
Decoration Styles
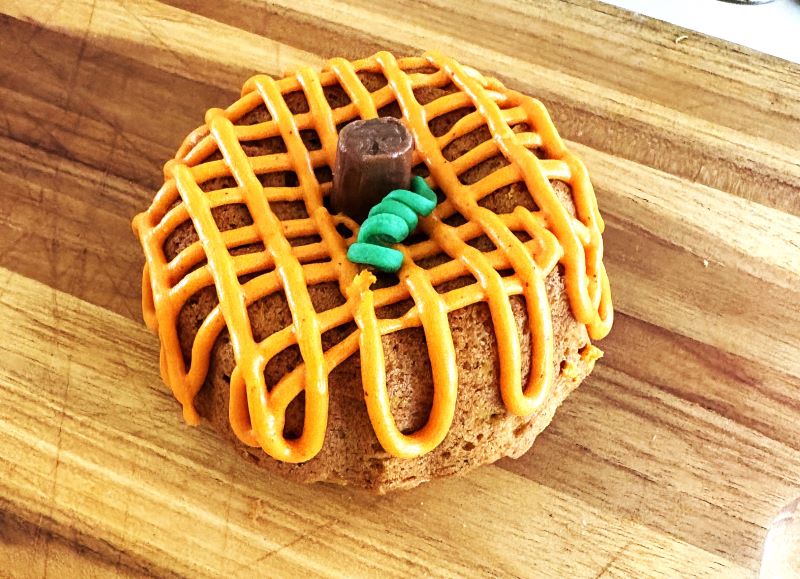
So as you can see from the two pictures above above, you can go two directions here: half pumpkin or full pumpkin. A full pumpkin is two mini pumpkin bundt cakes held together with a layer of maple frosting and then coated in the salted brown butter maple icing.
I chose to do both half and full pumpkins, because one of my sons’ birthdays is right around Halloween. He needed a cake. Or a little patch of tiny pumpkin smash cakes. (Although all my children at age one just gaze at the cake, then me, then the cake, and do not under any circumstances touch the cake. Maybe I’m too excited?)
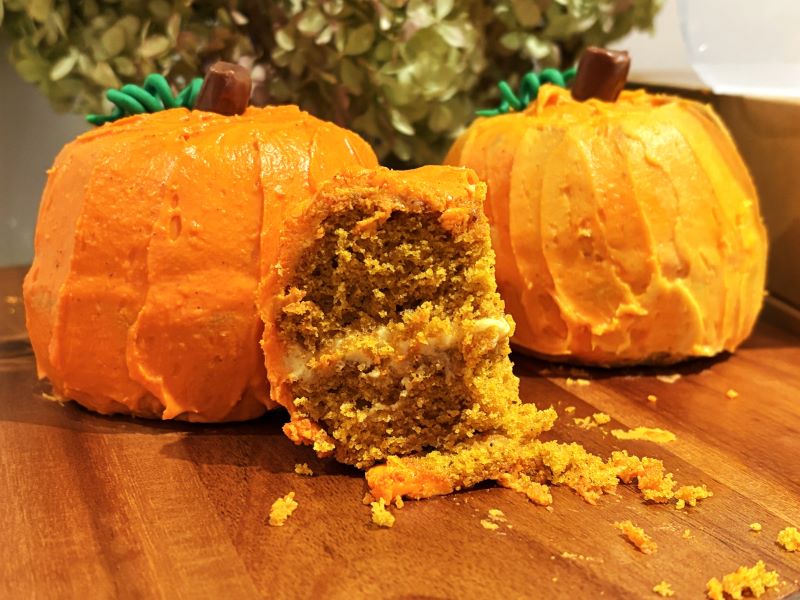
The primary advantage to doing just the half pumpkin is that you only really icing. The salted brown butter maple icing, while delicious, is an icing and therefore not ideal as a filler between two cake layers. So if you want to stick two bundt cakes together and go full pumpkin, you’ll need a small batch of maple frosting.
In the below recipe, I am just going to give directions for the half pumpkin situation. If you are reading this and want more info on going “full pumpkin,” message me and I’m happy to share the dets!
Print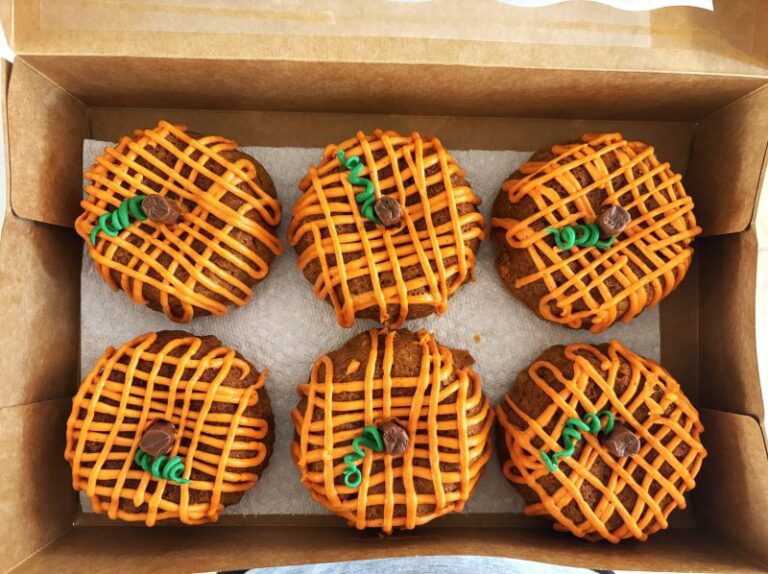
Mini Pumpkin Bundt Cakes with Maple Frosting
Mini pumpkin bundt cakes, made to look like tiny little pumpkins. The cake is moist spiced pumpkin and the icing is a salted brown butter maple. Completely addictive!
Equipment:
4-inch mini bundt cake pans. I used these. I needed 16 for the below recipe.
Piping bag with a small round tip.
- Total Time: 2 hours
- Yield: 16 cakes 1x
Ingredients
Wet Mixture for Pumpkin Cake
1/2 cup butter, softened
2 cups brown sugar
1/2 cup olive oil
2 eggs
1 15 ounce can pumpkin puree
1/2 cup sour cream
Dry Mixture for Pumpkin Cake
3 cups all purpose flour
2 tsp baking powder
1 tsp baking soda
1 1/4 tsp salt
2 tsp ground cinnamon
1 1/2 tsp ground cardamon
1/4 tsp allspice
1/4 teaspoon freshly ground black pepper
Icing
4 tbsp unsalted butter
2 cups powdered sugar (sifted)
1/2 cup maple syrup
1/8 tsp salt
orange food coloring (I like this natural one)
Decorations
16 tootsie rolls
green fondant (about 1/4 cup)
Instructions
1. Preheat oven to 350F.
At the same time, prepare the tiny bundt pans by spraying them down well with avocado oil, canola oil, coconut oil, or similar. Place them on a baking sheet (this will make it much easier to get them in and out of the oven).
2. Prepare the wet mixture.
Using a stand mixer (or a handheld mixer and some arm endurance), combine:
- 1/2 cup butter, softened
- 2 cups brown sugar
- 1/2 cup olive oil
Beat on medium speed for about 3 minutes until the mixture is well-combined, light, and airy. You will probably want to scrape down the side of the bowl 2-3 times during this period to make sure the ingredients are combined very well. Your goals are to incorporate a lot of air into the mixture at this stage and have a very uniform mixture.
Reduce the mixing speed to low-medium. Next, add one egg, beat for 20 seconds. Then add the second egg, and beat for another 20 seconds. Then add in:
- 1 15 ounce can pumpkin puree
- 1/2 cup sour cream
Beat until combined well. Make sure to scrape down the sides of the bowl to ensure an even mixture. Once mixed, remove the bowl from the stand mixer. The rest of the mixing will be by hand.
3. Prepare the dry ingredients.
In a bowl, whisk together:
- 3 cups all purpose flour
- 2 tsp baking powder
- 1 tsp baking soda
- 1 1/4 tsp salt
- 2 tsp ground cinnamon
- 1 1/2 tsp ground cardamon
- 1/4 tsp allspice
- 1/4 teaspoon freshly ground black pepper
4. Fold dry ingredients into the wet pumpkin mixture.
Use a spatula to fold in the dry ingredients until you have a well combined batter. Do not over mix.
5. Prepare to bake.
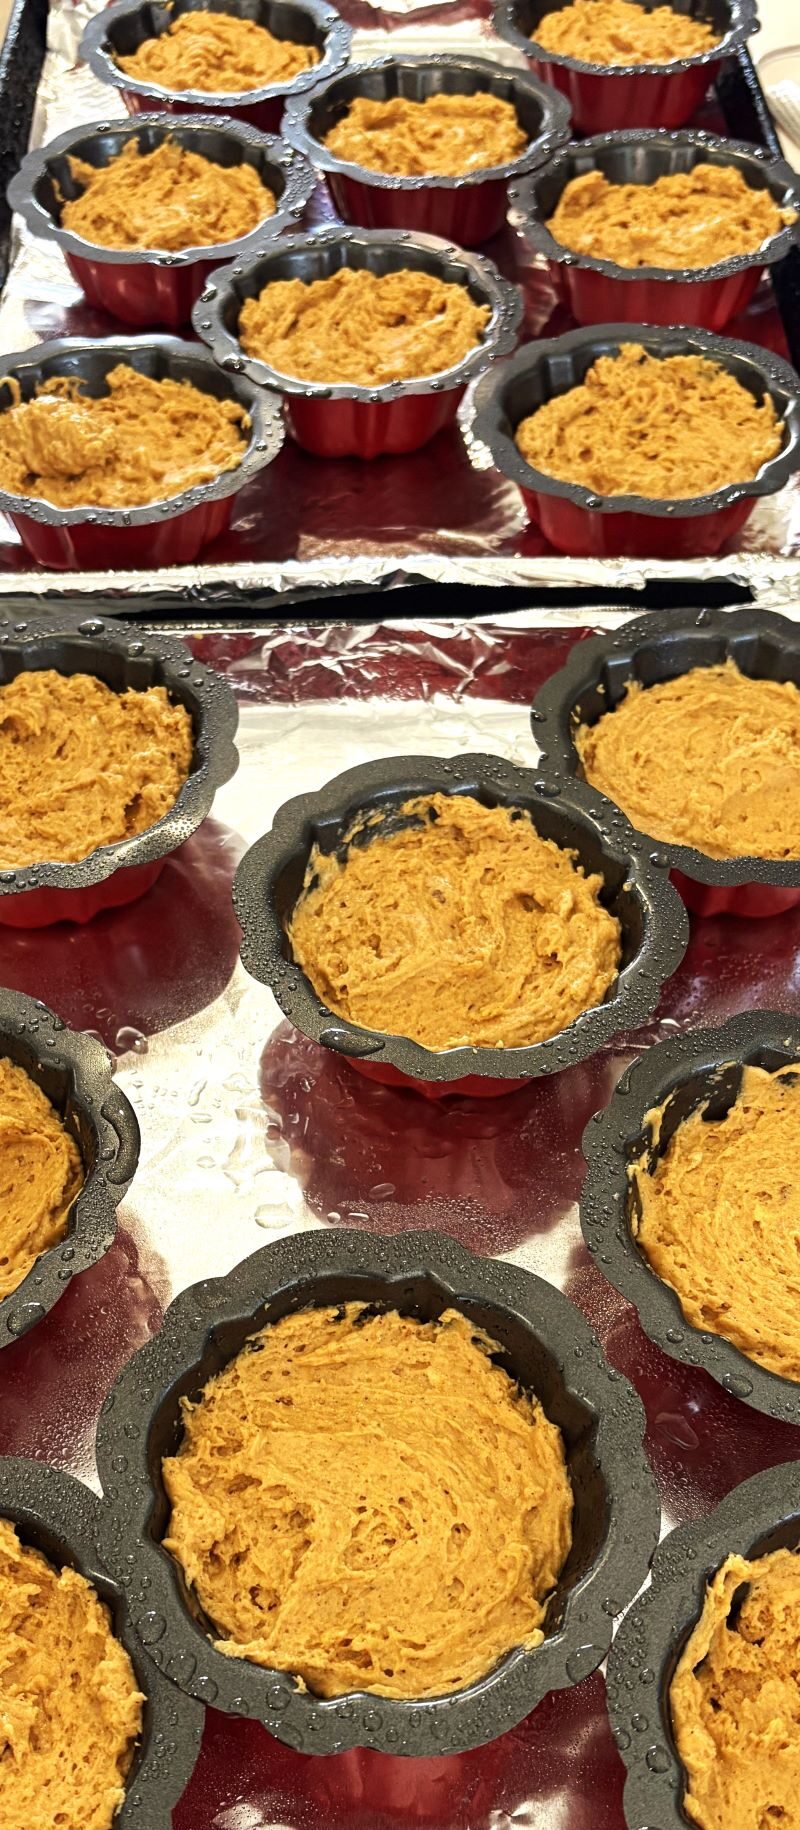
Scoop the batter into the bundt molds. You want it to come about 2/3 of the way up the mold. For me, each tiny bundt tin took about 1 1/2 scoops using this 3 tablespoon cookie dough scooper.
6. Bake for 20 minutes at 350F.
Bake for about 20 minutes, then start checking on them every 2-3 minutes. Mine took about 25 minutes. They are done when you can tap them on top and they don’t give when pressed. You can also stick them with a toothpick/ tester to see if it comes out clean. (Clean or with a crumb or two = done; wet batter = needs more time).
7. Allow to cool for 10 minutes.
Once they’re baked, allow them to cool (but not too long!) After ten minutes of cooling, flip the little cake tins over onto a cooling rack. Mine popped out pretty easily, but you may need to loosen them a bit by running a knife very, very gently around the outside of the tins. Once they’re out of the tins, allow them to cool completely (about 1 hour).
8. While the cakes cool, make the icing.
The first step is to make brown butter. Melt your 4 tbsp of unsalted butter in a light-bottomed frying pan over medium heat. (Light color is important so you can easily see the butter start to brown). Stir frequently with a wooden spoon or spatula. The butter will start to foam and will begin to turn a light and then darker amber. It’s important to watch the butter closely because it can easily burn. As soon as the butter becomes a medium brown and smells delicious and nutty, remove it from the heat to cool. The process should take no longer than 7-10 minutes. Allow the butter to cool for 10-15 minutes.
Once the butter has cooled off a bit, mix in 1 1/2 cups of sifted powdered sugar (sifting avoids blockages when you’re piping it onto the little cakes later!), 1/2 cup of maple syrup, 1/8 tsp salt, and orange food coloring. I used 1/2 of these natural orange food coloring packets dissolved in 1 tsp of water. I was concerned about the smell (there was a bit of a peppery smell when I opened the packet) but it was not detectable at all once mixed into the icing.
The icing should be thick, but spreadable. If it feels too thin/runny, add in more powdered sugar.
9. Decorate!
Once the cakes have cooled, get the icing into a piping bag with a narrow round tip. Pipe in a zigzag across the top of the cake one direction, and then in zigzags going perpendicular to the first ones. Place a tootsie roll upright in the center of the little cake.
To create the green curly stem/leaf part, roll a tiny piece of fondant into a thin little snake about 4 inches long. Wrap it around the tip of a chopstick or pencil very gently, and then slide it off onto the top of the pumpkin.

10. Enjoy!
- Prep Time: 45 min
- Cook Time: 20 min
- Category: Dessert
- Method: Bake

