Rainbow Chard, Ricotta, Feta, Cheddar, Lemon Zest, and Summer Herbs . . .
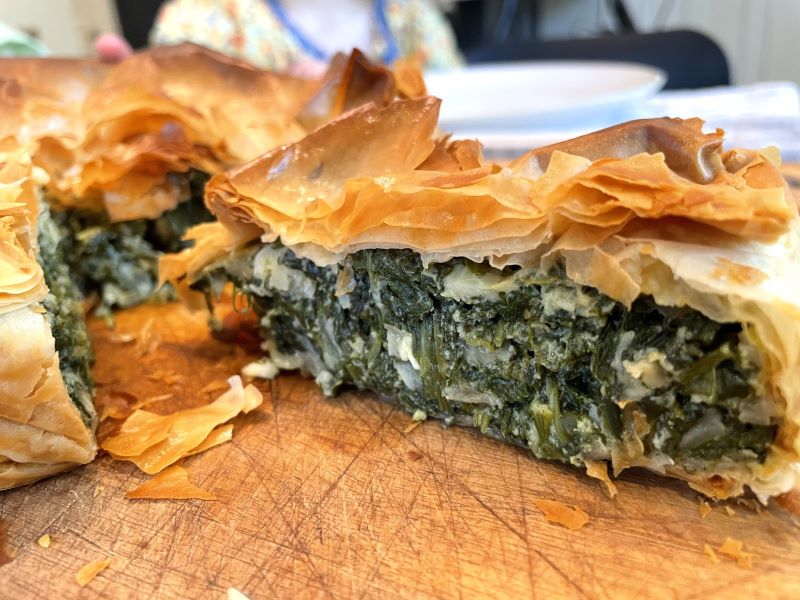
This greens pie is my current favorite recipe. It is very similar to spanakopita, which I’ve always loved. In college, I would buy 5 or 6 packs of the little spanakopita triangles at a time. There were weeks where I would eat most of a package every night. My college roommate would tease me about my ever-accumulating spanakopita stash, but I was shameless.
So why mess with a good thing?
I have wondered in the past about exactly how to make fresh spanakopita. I made a version of this greens pie the first time on sort of a whim. And OMG, the FRESH ONE IS SO MUCH BETTER. It does not compare. This greens pie recipe was inspired by the Herb Pie recipe in Yotam Ottolenghi’s Jerusalem cookbook. I cannot recommend this cookbook highly enough.
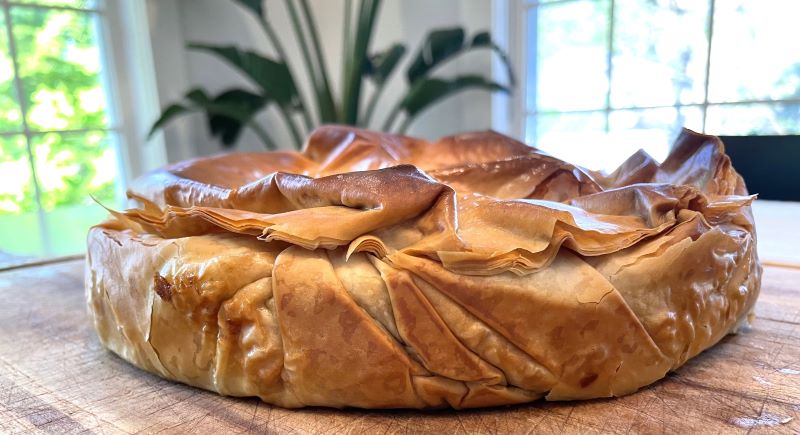
Is it really worth it to make your own?
I’m going to be straight. Yes, making spanakopita takes significantly more time than popping some frozen spanakopita triangles into the oven straight out of the freezer. I have developed some hacks (which of course I’ll share) to speed up and streamline the process a bit. I also make the filling in larger batches now and keep it in the refrigerator or freezer until I need it. The recipe below will make 2-4 spanakopita, depending on how thick you like the greens layer. My kids like it rather thin, so I usually make about 4 spanakopita with this recipe.
If you have only had the frozen version of spanakopita, you have NOT had a good greens pie. Even when you get it in a restaurant, they typically make it earlier in the day and reheat it. The result is often soggy crust. It’s just not on the same level as one you’ve just made coming straight out of the oven.
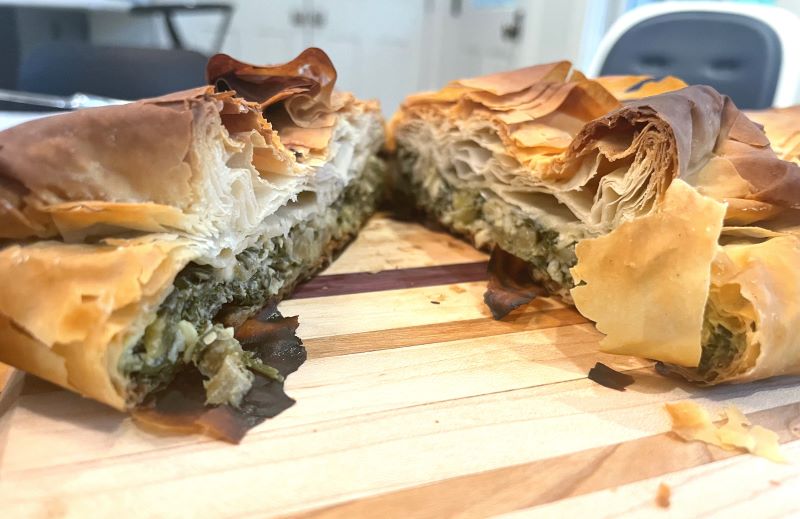
I suppose I should be clear that this greens pie is not technically spanakopita because it doesn’t contain spinach. This recipe calls for rainbow or Swiss chard, which I find has a better texture. But this is definitely in the same category as spanakopita. This fresh version has summer herbs, no squidgy texture, a hint of lemon zest, and as much crispy filo dough as your hear desires. It is a summertime delight for me. It’s like eating an herb garden, but with cheese and a super crisp crust.
On the topic of the crust, I use store-bought frozen filo dough because I have not yet ascended to the level where I have enough time to experiment with making filo dough. The store bought one is very delicious, and I’ve not been tempted to try to make the filo myself. The one linked above comes with 16 sheets of filo – enough to make about 3 spanakopita (I use about 5 sheets of filo per greens pie).
The Kid Factor
A big benefit (other than deliciousness) of making this greens pie yourself is that you can control the crust to filling ratio. My daughter loves spanakopita too. But she will not eat it if there is a thick wad of the green filling (no matter how much I may rhapsodize about how good it is). Even the frozen triangles which do not have a lot of filling can be hit or miss. (The corners are the best part, we agree on that). Sometimes my daughter powers through the whole triangle. Other times she will just eat the crust off and then very, very sulkily eat some of the greens if we promise her dessert. Not a good look.
So I remembered these delicious greens and cheese pies that my husband and I would have for breakfast at a bed and breakfast where we stayed in Milos shortly after we were married. It was maybe 2 sheets of filo dough, a thin layer of herbs or cheese, and then two more sheets of filo. Not exactly a pie — more of a pancake-cracker-spanakopita hybrid. I believe they were a version of Tiganopsomo.
From this inspiration, I’ve made a very thin greens pie inspired (see above) for my daughter. She eats it very happily and asks for more. We just have a rule that she has to eat all the greens if she wants the second slice. With the greens this thin, it’s usually no problem for her. So this has also become one of our frequent vegetable recipes for the kids.
I will note that these aren’t quite like those we had on Milos. Those pies were even thinner but with less filo dough. Just inspired by those pies. I’ve been playing around with recipes to get to the amazing pies we had in Milos. This is still a work in progress.
About Those Greens
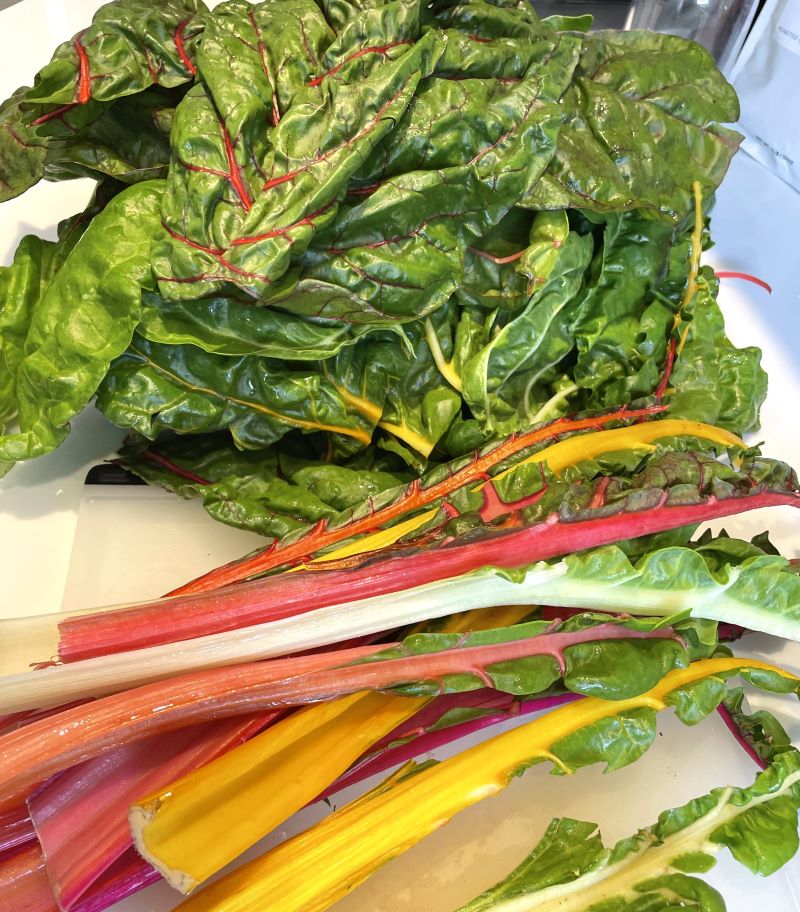
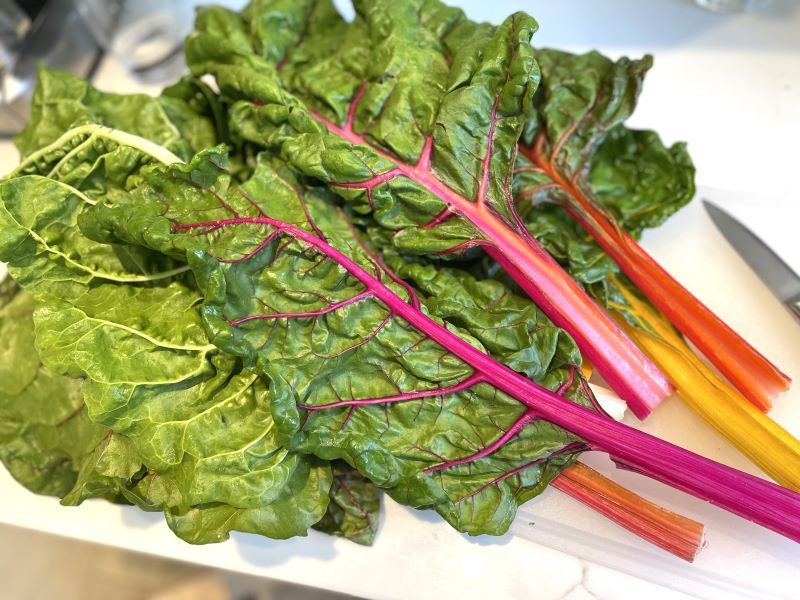
In my journey to discover how to make the best spanakopita, I’ve tried recipes with spinach as the primary green for a true spinach pie, but the texture is just not as good. Spinach gives it more of a gooey, squidgy texture. I’ve tried mixing in spinach alongside the chard, which is quite good and a great option. That said, my favorite way to eat this is just with rainbow chard and herbs. So the greens pie recipe here uses chard and no spinach. My daughter loves the colors. (I do too for that matter. Isn’t it beautiful?!) You could also use Swiss chard or another big leafy green.
Look! They’re like little rainbow trees . . . .
The other thing that is nice about this recipe is that although it does admittedly take a while to chop and wilt all these greens, it is still a relatively low-touch recipe. If I am alone, I can make a pie start to finish in about 45 minutes. If I have kids around, sometimes it takes me about an hour and a half with the stove heat just on really low and me throwing in additional greens to wilt between wrangling kids. Fortunately my oldest two are at an age where they like to play together or do small tasks while I cook, which requires a lower degree of supervision (primarily supervising for fights and mischief). Point being, this isn’t the type of recipe where if you leave it unattended for five minutes it’s going to burn and be ruined. It works well with doing other things at the same time.
Print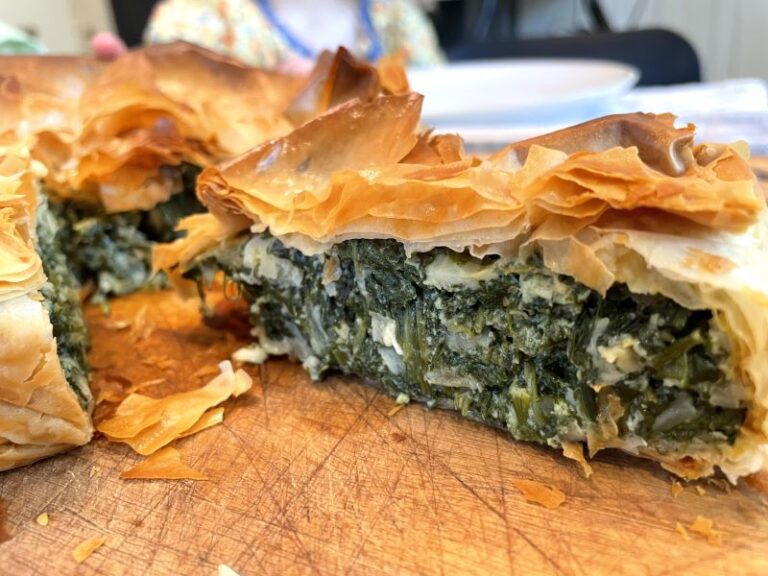
Spanakopita-Style Greens Pie with Fresh Summer Herbs
Rainbow Chard, Ricotta, Feta, Cheddar, Lemon Zest, and Summer Herbs . . .
This greens pie is my current favorite recipe. It is very similar to spanakopita, but it is not made with spinach. It has summer herbs, no squidgy texture, a hint of lemon zest, and as much crispy filo dough as your hear desires. It is pure summertime for me. It’s like eating an herb garden, but with cheese and a super crisp crust.
This recipe makes enough greens for 2 thick pies or 4 thinner pies (our go-to). I typically make 1 pie on the day I make the filling, and then save the remaining filling in the refrigerator so that I can make more freshly baked pies throughout the week. The filling keeps 3-4 days tightly sealed in the refrigerator, longer in the freezer.
- Total Time: 1 hour 40 minutes
- Yield: 2 thick pies or 4 thin pies
Ingredients
Greens Mixture
Cheese Mixture
Filo Pastry
Instructions
1. Defrost filo.
Assuming you are using frozen filo, get it out of the freezer now. It needs 3 hours of defrosting at room temp before you can use it. It will take you approximately 45 minutes to get from the start of this recipe to the point when you can start to use the filo. If you get there before the filo is fully defrosted, however, the filling can hang out for several hours (I will store it in our fridge for a couple of days after making it so I can make multiple pies).
2. Begin with the onion.
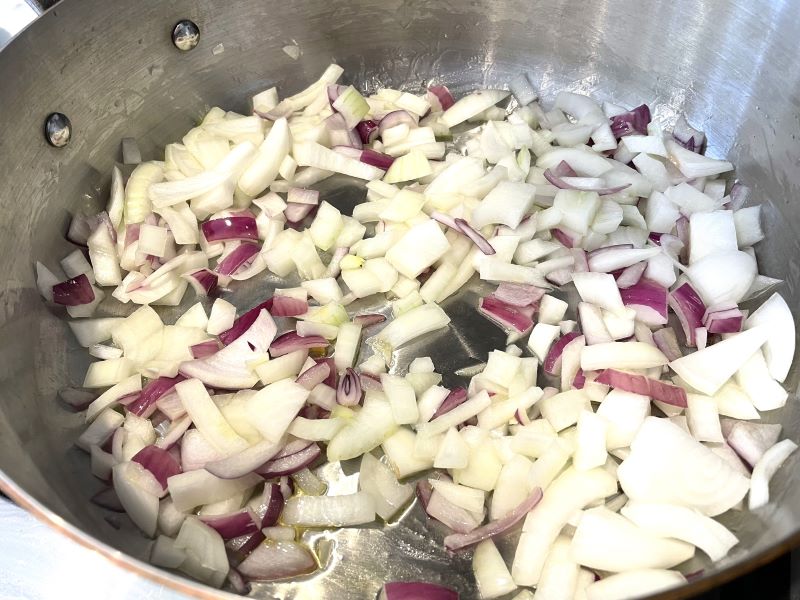
Chop up the onion and sauté it in a large pan with high sides on medium heat until it starts to caramelize a bit (about 10 minutes). I used a mix of red and yellow onion in the below picture, but either or both types of onion will work.
3. Remove the chard stems from the rainbow chard.
I usually use a paring knife to cut out the stems, but you could also use a zealous toddler to rip the leafy bits off of the stems. Either approach works in my experience.
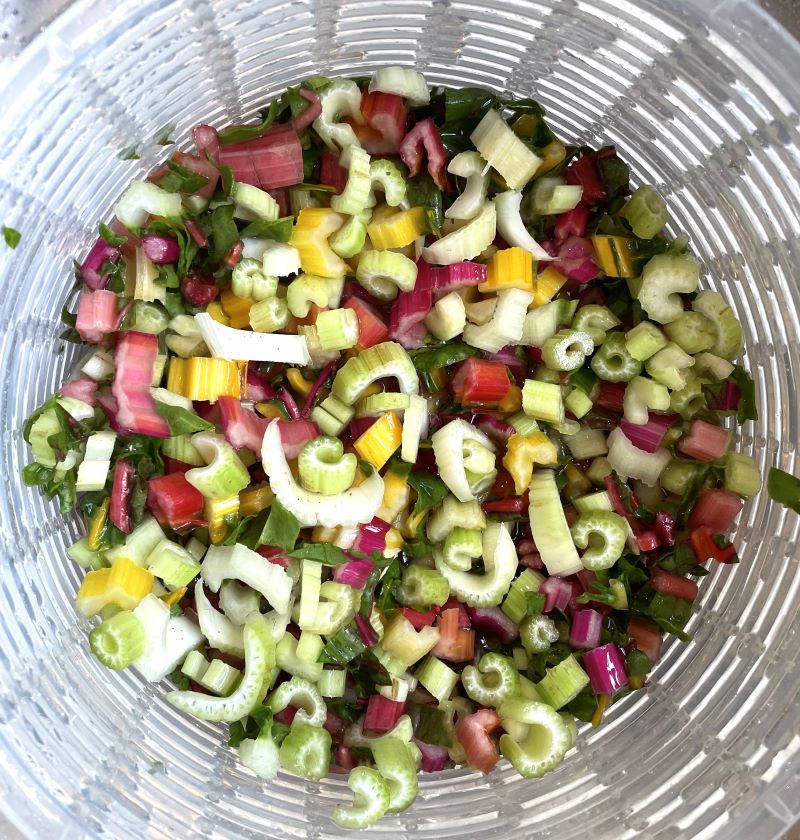
4. Chop the chard stems and the celery and wash thoroughly.
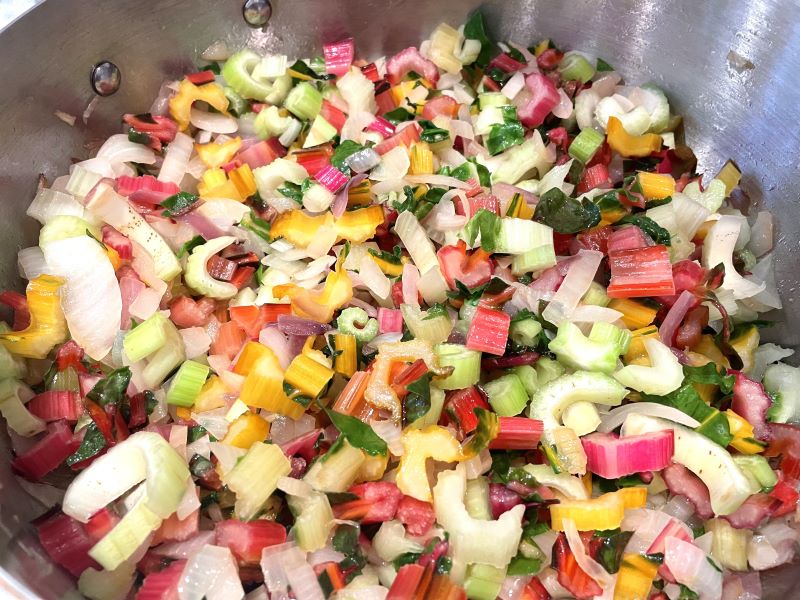
5. Add the chard stems and celery to the onion and cook another 5 minutes to soften.
I say 5 minutes, but usually I just keep cooking over low-medium heat while I prep the other vegetables that need to go in the pan, so sometimes it takes me a tad longer.
6. While the stems cook, shred the chard leaves.
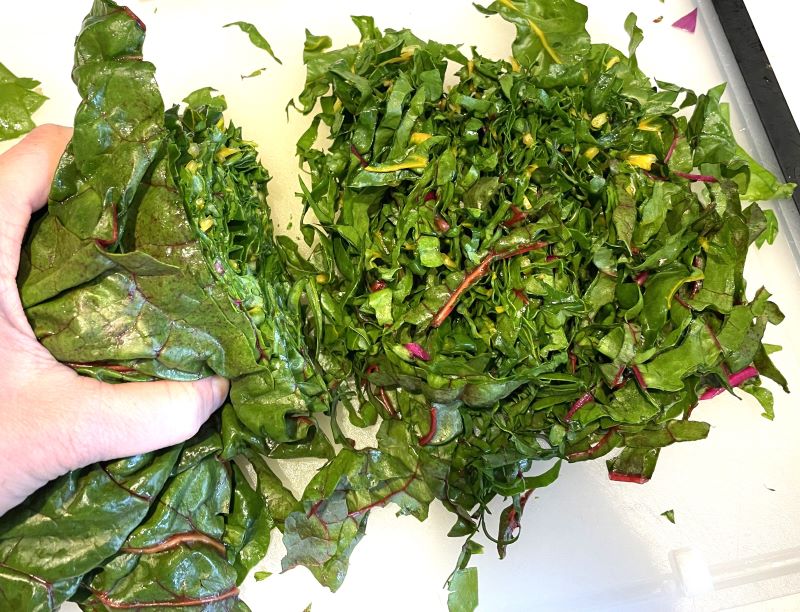
I bundle together my leaves into a tight burrito and then shred them pretty finely. Then I throw them into the salad spinner and wash them thoroughly.
7. Add the remaining greens to the pan.
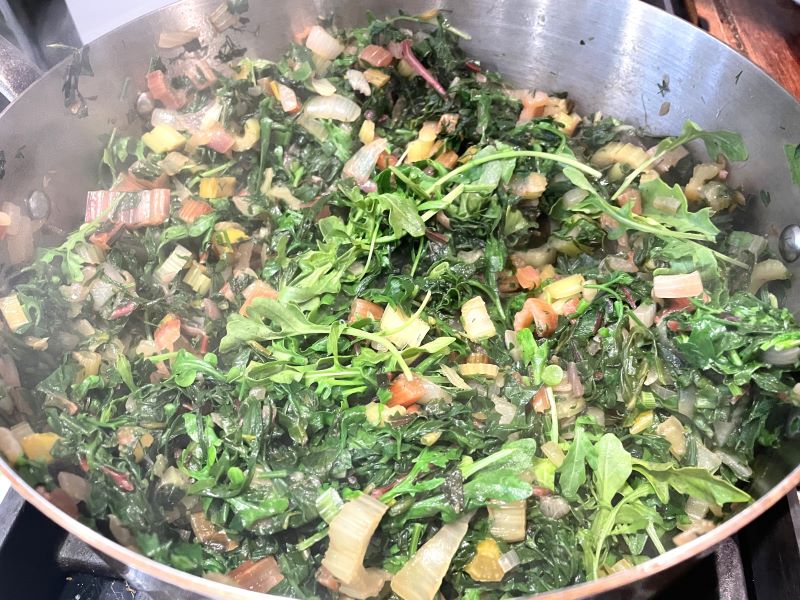
There will be a lot of greens, and they will take up less space as they wilt down. I usually start with the chard, then the chopped green onions and the arugula, and finally the roughly chopped herbs. Cook until just wilted and then turn off the heat and set aside to cool a bit.
8. Squeeze out the liquid from the greens.
You have two options here.
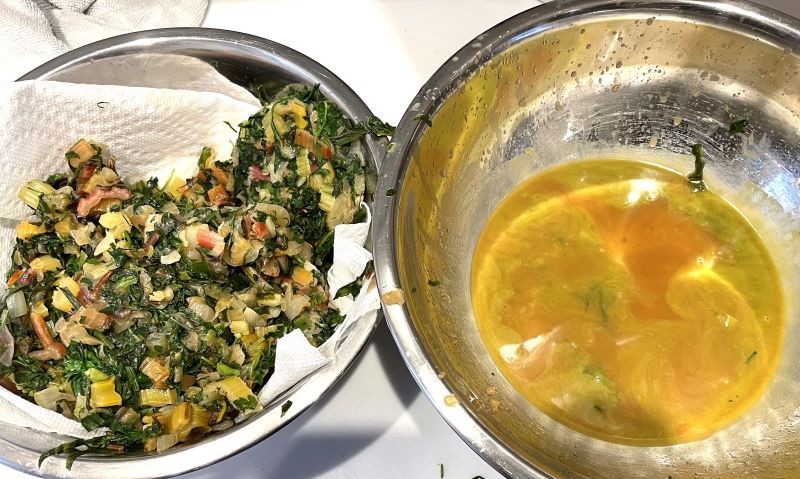
Option 1: My preferred method (pictured below), using a potato ricer. I set up two bowls next to the pan of wilted greens — one to collect liquid, and one to dump out the greens after squeezing. I usually put about 1/2 a cup of greens in the ricer at a time, squeeze it to get out as much liquid as I can, and then pop out the greens into the second bowl.
Option 2: You can put the greens in a strainer and let them sit over a bowl. The liquid will drip out of them. This will take at least 1-2 hours for you to get a decent amount of liquid out.
9. Do not skip the previous step.
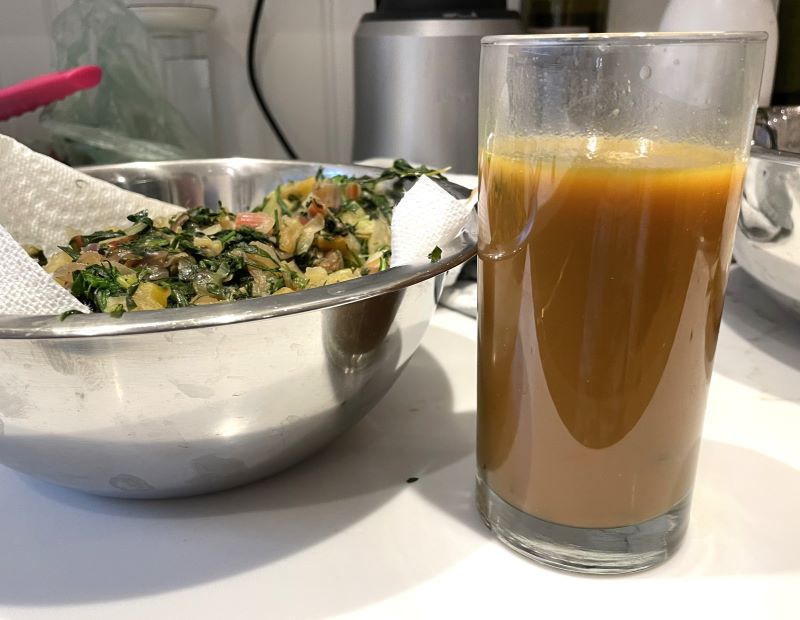
You will be tempted. I know from experience. If you skip the prior step, you will end up with soggy filo dough and question all the hassle you just went through. FYI, here is how much liquid I removed from the greens last time I made this recipe.
10. Make the cheese mixture.
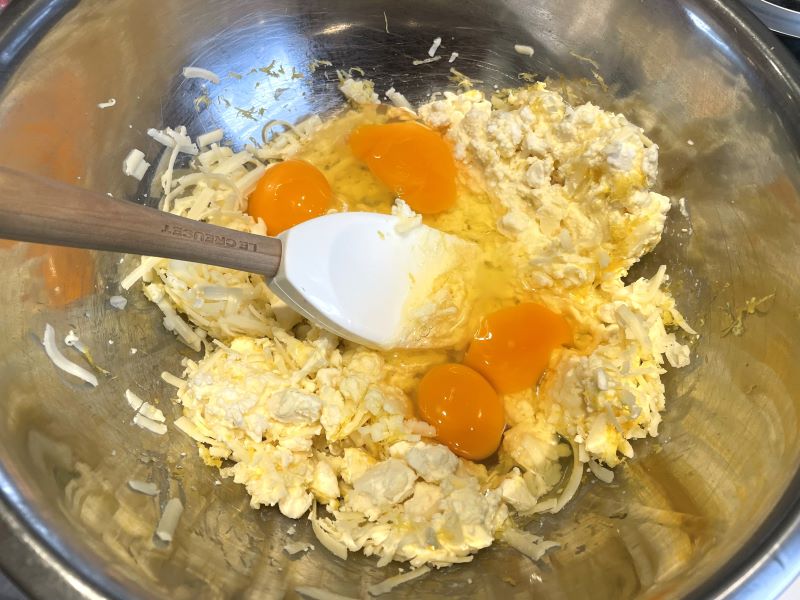
Add the cheeses, eggs, lemon zest, salt, and pepper to a bowl. Mix together well.
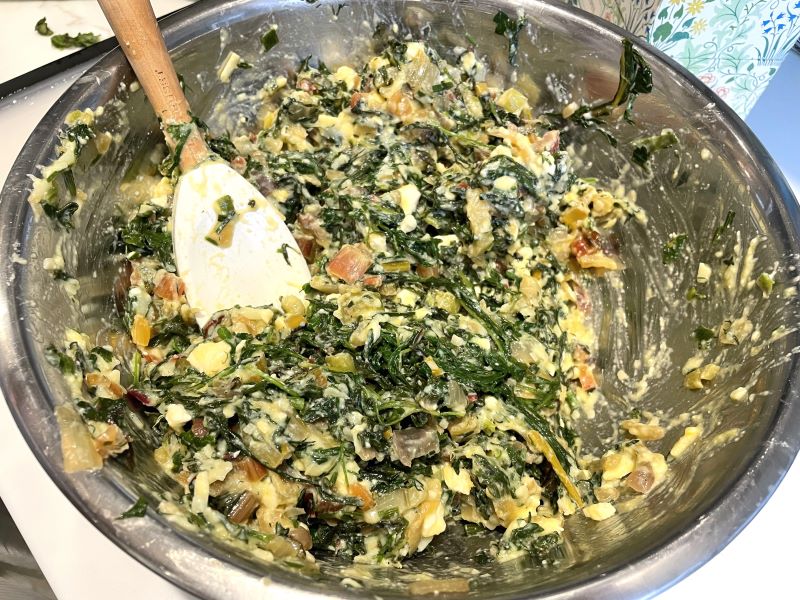
11. Combine the greens and the cheese mixture.
The filling is now complete and the hard part is over!
12. Prepare the filo.
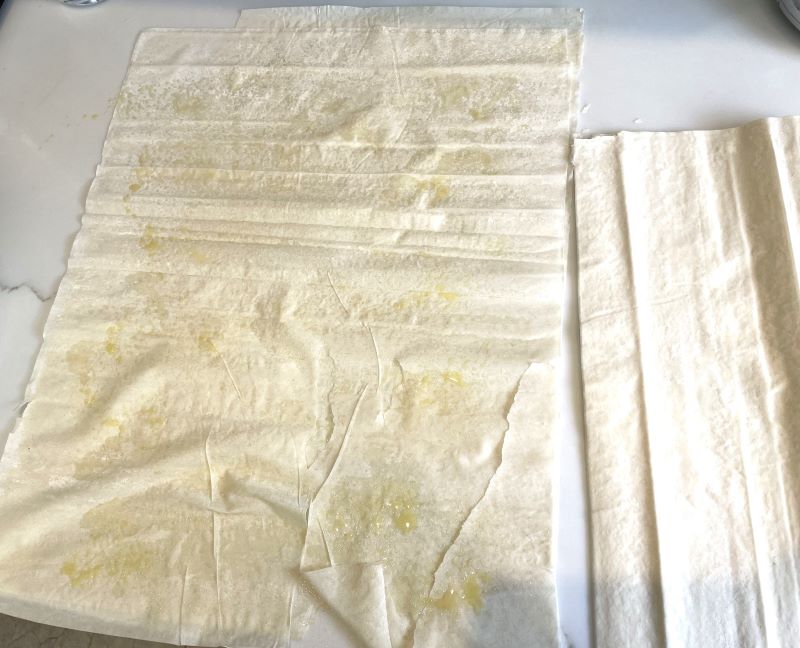
First, make sure your filo is properly thawed. Then open it up and unroll it. Makes sure you have a clean, dry countertop workspace. Take the first sheet of filo dough out and place it on the counter. Spray or brush it with olive oil (I usually do about 1/2 – 1 tsp of olive oil per sheet. Then place a second sheet on top. Spray or brush again with olive oil. Do this until you have a stack of 5 sheets.
13. Drape the filo dough.
Take the 5 sheets of filo dough and drape them gently over the dish you will use to bake your pie.
For a thick pie, I usually use a well-olive-oiled large ramekin or pie dish with sides. This makes sure the sides of the pie are supported during the cooking process. You will need to be very gentle when laying the filo dough into the pie dish. Gently press it into the edges of the ramekin. Spread a thick layer of the greens mixture (maybe 2 – 2 1/2 inches thick).
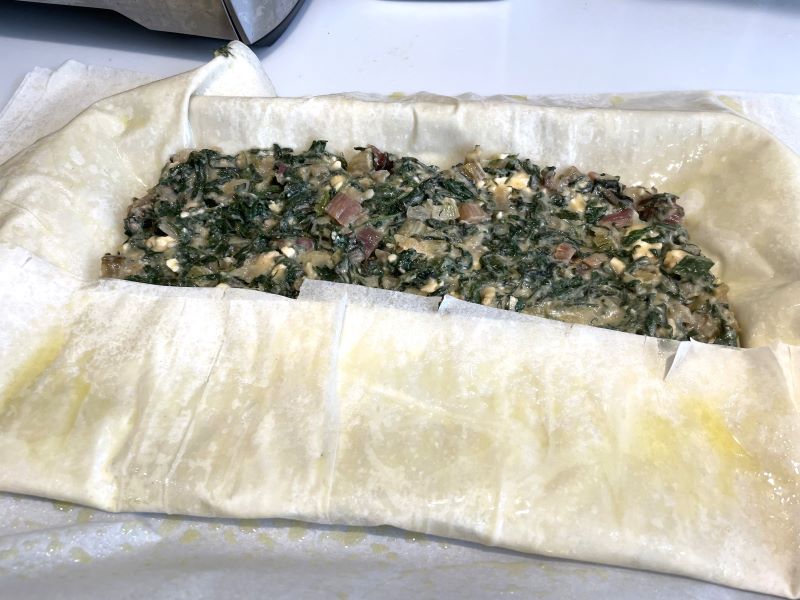
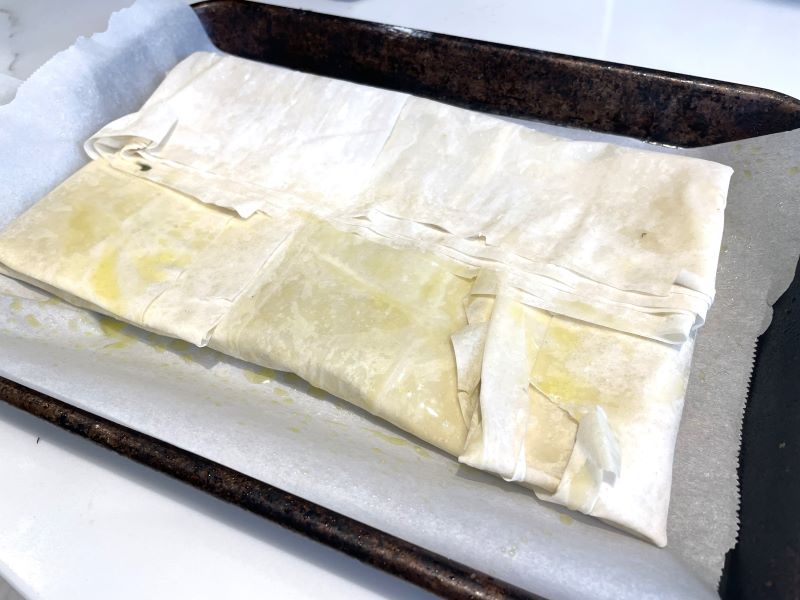
For a thinner pie (and an easier approach), I use a baking sheet with a piece of parchment paper on top (pictured). Spread a layer of the green mixture in to the filo dough. In the picture below, I am using a quarter sheet pan, and I aim to spread the mixture about 1/2 inch thick, in a roughly 5 x 8 inch rectangle in the middle of the filo.
14. Fold the filo over the top.
For the thick pie, trim around the edges of the filo dough so that about 2 inches overhangs the sides of the baking dish. Fold the overhanging filo dough over the pie. Create another 5-layer stack of filo dough following the instructions in step 12 above. Cut the stack into the shape of your baking dish and place over the top. Scrunch up the pastry a bit to get some waves in the top of the pie.
For the thinner pie, fold the overhanging filo dough over the pie, starting with the bottom, then fold over the two sides, and finally fold over the top. Once finished, scrunch up the filo dough to get some waves.
15. Spray or brush the top of the filo with olive oil.
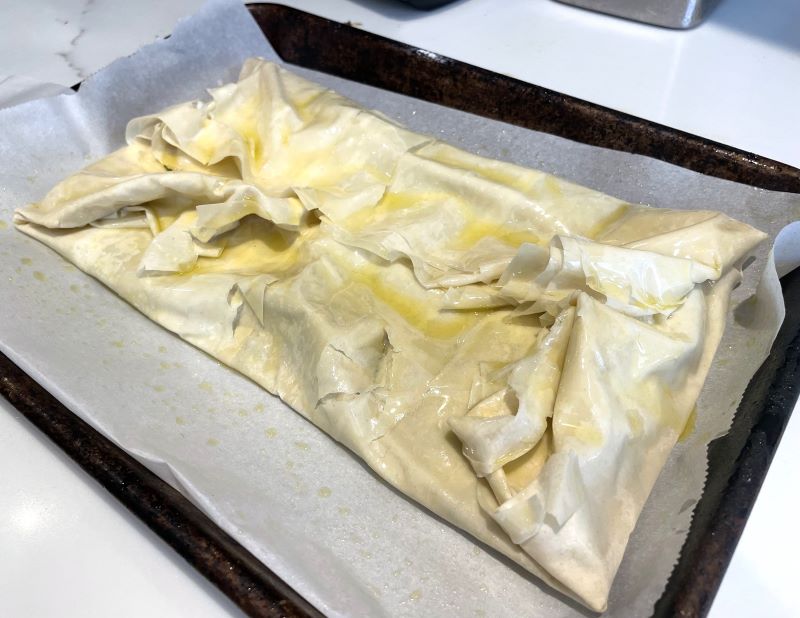
16. Bake the pie at 400F for about 40 minutes.
You could probably bake the thinner one for less time, but overbaking hasn’t really been an issue for us (at least so far).
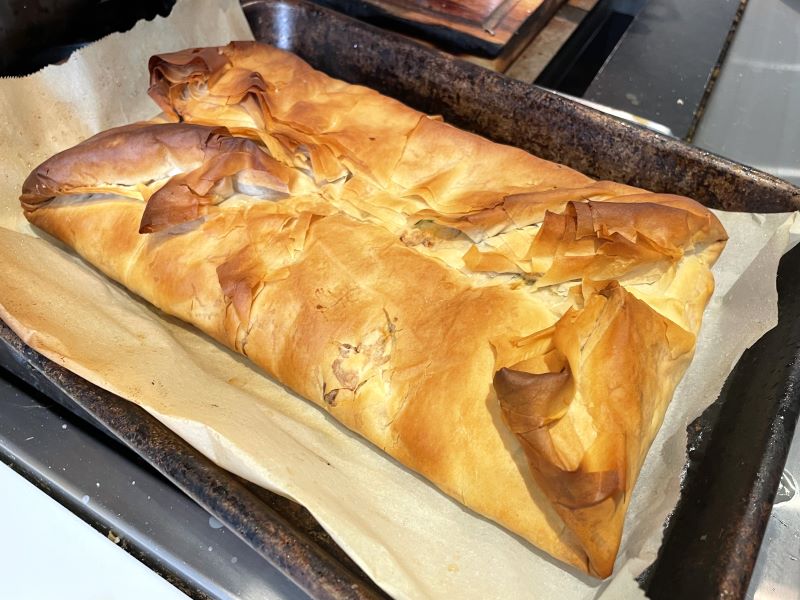
17. Enjoy warm or at room temp!
- Prep Time: 60 min
- Cook Time: 40 min
- Method: Bake, stovetop

