This nut-free Galette des Rois is made with chocolate coconut instead of the traditional almond frangipane filling, making it safe to bring to school as a treat. The lucky child who finds the hidden orange rind is crowned king for the day!
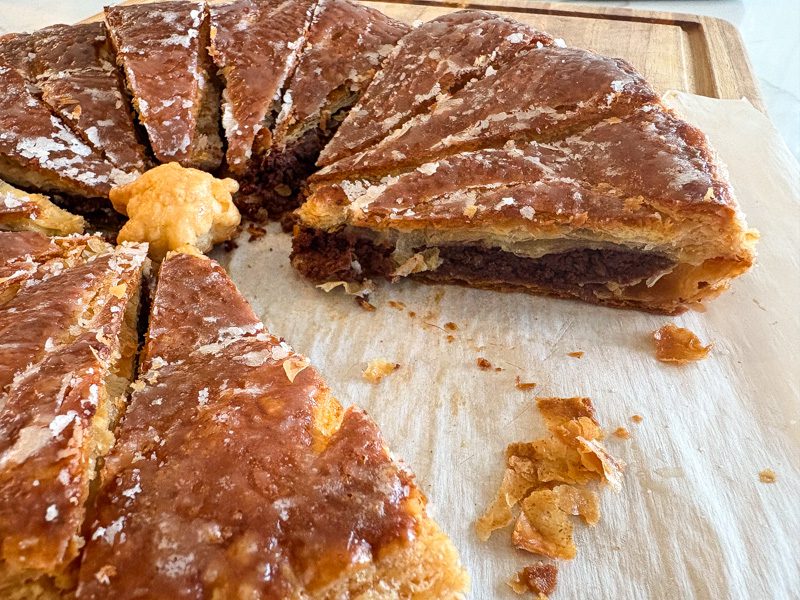
What is a Galette des Rois?
My daughter is attending a Catholic school, where they celebrate the Epiphany on January 6. For those who don’t know, the Epiphany commemorates the arrival of the three kings following the birth of baby Jesus.
I grew up in a Protestant home, where we didn’t celebrate the Epiphany. But I had grown up hearing about the French tradition of the Galette des Rois in my school French class. It’s also one of the fun school experiences Karen Le Billon mentions in her book detailing her family’s move to France (my nutrition-related takeaways from her book can be found here).
The Galette des Rois (or King cake as it’s called in English) is a buttery French pastry-style cake filled with frangipane. It includes a hidden bean or porcelain figure (the fève). Whoever finds the bean in their slice of cake gets to be king (like one of the three kings!) for the day. The lucky person gets to wear a crown and all!
Why a nut-free Galette des Rois?
Naturally, when I saw the occasion listed on my daughter’s school volunteer calendar, the little kid in me got very excited and immediately volunteered to make a Galette des Rois. A couple days later, I remembered that schools are now nut free. Also, what if one of the little kids broke a tooth or choked on the bean?
As far as the nut issue, I could instead make a New Orleans style king cake, but I’ve always been excited about the French version. It is so much prettier and so much tastier! So I started researching variations on frangipane that are nut-free: oat filling, apricot jam filling, coconut filling. Eventually, I settled on one I thought would appeal to most kids: a filling made with coconut and chocolate.
The fève (or bean) was also critical! So I trialed several different bean alternatives: marshmallows, raisins, and orange peel. The marshmallow disintegrated. The raisins became soft as they cooked and so didn’t stand out enough from the rest of the filling. Orange peel worked the best — it does not go anywhere and is pretty is impossible to miss, but it is edible and won’t break anyone’s teeth.
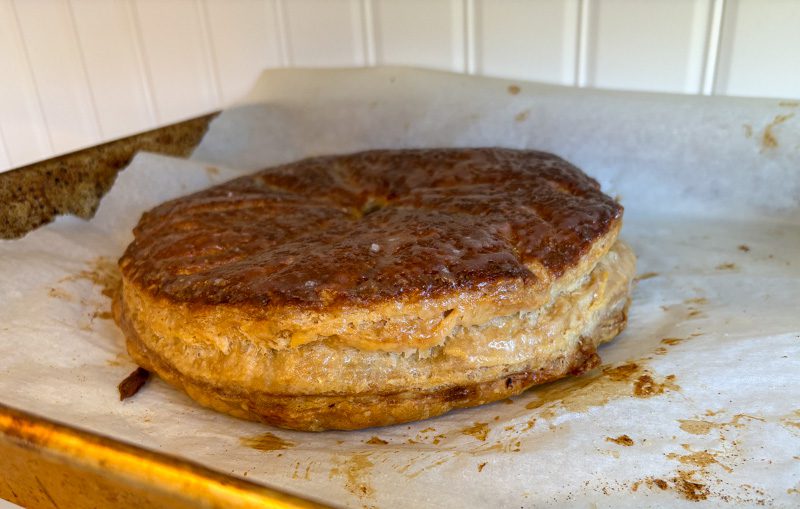
The Results: A Chocolate Nut-Free Galette des Rois
The results came out quite well I think. We trialed a few at home to make sure they worked. I have two primary thoughts on how to improve this version of the recipe for next year.
The chocolate coconut filling
I chose a coconut chocolate filling because it was similar in texture to frangipane but had no nuts. Probably keeping it to just a coconut paste would have been a bit closer to frangipane, but I think a chocolate element is more likely to appeal to kids. So I stand by that decision.
But once you add the chocolate, you’re already far afield from frangipane. What I didn’t fully appreciate was how adding the chocolate to the coconut filling results in a filling that is actually quite mild in flavor. This is probably a good thing for most kids, especially those who like milk chocolate. That’s why I recommend using milk or semisweet chocolate below (not bittersweet). This means you don’t get the strong punch of dark chocolate, like you would get from a rather similar pastry, the chocolate croissant.
My daughter, who loves dark chocolate, wanted the filling to be more chocolaty. I also really enjoy the punch of dark chocolate in sweet puff pastry. So for next year, I think I’ll try just using straight up chocolate ganache for a filling, made with butter instead of cream (for less moisture).
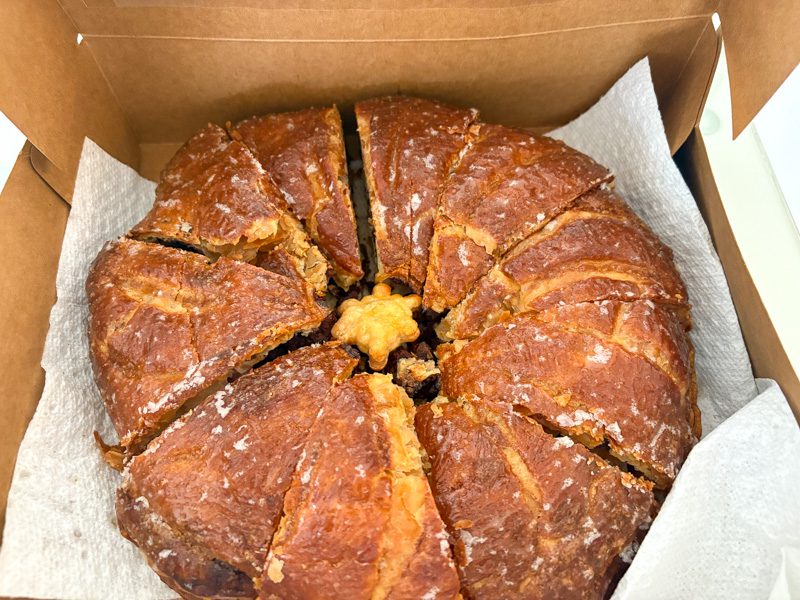
The pastry top
Second, the sugar glaze. I first tried the cake without the sugar glaze, as I thought it probably was not necessary given that the egg wash already made the pastry shiny. What I didn’t realize is that the outside of puff pastry becomes soft fast – like within a few hours. The sugar glaze actually contributes to keeping the top of the cake interesting. So the sugar glaze (apparently a standard in French pastry shops) is important.
I do think we could do a bit better than the sugar glaze though. Here’s why.
The primary reason we have puff pastry in our freezer at all times is that I love a good tart tatin. You cook apples in a caramel sauce in a cast iron skillet, then layer the puff pastry on top, bake, and then flip the whole thing over and you have a delicious apple pastry dessert. One of my favorite versions of this was when I accidentally doubled the amount of caramel one year, and the caramel dripped down all over the puff pastry and hardened. It made the pastry so crisp and delicious, even the next day. So I would like to experiment with painting a caramel sauce over the top of the pastry for next year, to see if we can get a good thin crisp caramel on top. That with a dark chocolate ganache filling would be pretty amazing, if I can get it to work. Even if it’s not an authentic Galette des Rois. It might just have to be a different pastry cake altogether.
But as long as nuts are banned from schools, I take that as an invite to improvise.
The Crowns
The best part! Since I needed to make 2 cakes for my daughter’s class, I chose to send in two crowns. I got these, which were awesome. They adjust in size and they are very soft. I had to bribe my kids to take them off because they loved wearing them around the house after we had our trial cakes.
Anyway, these were so much fun to make, and my kids really enjoyed the process of making the cakes and especially trying to find the hidden orange peel in the final version we made. I’m glad we were able to come up with a school friendly version so my daughter can enjoy with her class.
So now, on to the recipe!
Print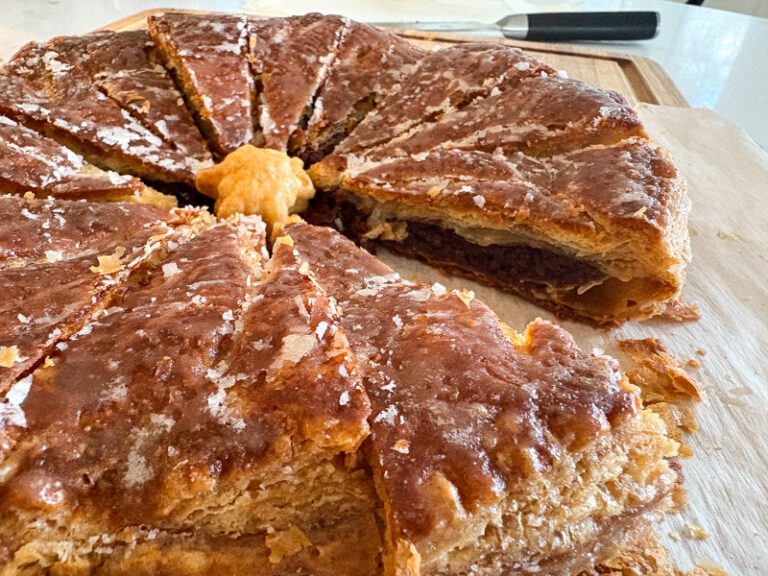
Chocolate Coconut Galette des Rois (Nut-Free King Cake!)
This is my school-friendly take on the French classic dessert to celebrate the Epiphany on January 6! Instead of frangipane, the pastry uses with a chocolate coconut filling and a fève made from a small piece of orange rind.
Equipment:
- 1 baking sheet
- 1 9-inch cake pan or plate (to use as a stencil for cutting the pastry)
- 1 pastry brush (I’ve used a twisted piece of paper towel in a pinch – not perfect, but workable if you don’t have a pastry brush available)
- Total Time: 60 min
- Yield: 12 servings 1x
Ingredients
Pastry
2 sheets of puff pastry, thawed
1 egg
flour for sprinkling (to keep pastry from sticking)
Filling
3 ounces semisweet or milk chocolate
3 tbsp butter
1/2 cup shredded coconut (unsweetened)
1/2 tbsp flour
1/8 cup sugar
1/2 tsp vanilla
1 egg
1 orange (just need a small piece of the peel, maybe 1/2 inch by 1/2 inch)
Glaze
1/2 cup sugar
1/2 cup water
1 tbsp butter
Instructions
1. Prepare the filling.
Break up the 3 ounces of chocolate into small pieces. Place in a microwave-safe bowl alongside the 3 tbsp of unsalted butter. Microwave in 20-second increments, stirring between each increment, until the butter has just melted and the chocolate has melted into the butter. Try not to heat more than necessary, but heat enough so that the chocolate has melted completely. You don’t want the mixture to get hot – just warm. Once all melted, set aside for a few minutes to cool.
In a food processor or blender, add the 1/2 cup shredded coconut. Pulse several times until the coconut resembles a coarse flour. Then add:
- 1/2 tbsp flour
- 1/8 cup sugar
Pulse again until well combined. Then pour in the chocolate butter combination, the 1 egg, and the 1/2 tsp vanilla. Blend until just combined. Do not overmix – you don’t want air getting into the mixture.
2. Prepare the puff pastry.
Here is the big picture: We are going to put one sheet of puff pastry on top of the other, with the filling sandwiched between the two layers. We will cut it out into a pretty circle. The layers will be stuck together with an egg wash that goes all around the edge, painted on the insides of the top and bottom layers of the pastry.
Here’s how we get there: Unfold both sheets of puff pastry, and check to make sure that they are large enough to cut a 9-inch round from. My sheets were slightly too narrow, so I sprinkled them with a little flour on both sides and rolled them out until they were about 1 inch wider.
Cut out a sheet of parchment paper large enough to fit a half sheet pan (this is the standard size sheet pan people use at home). Place the parchment on the counter. (I say place it on the counter because I find it easier to do this next part on the countertop and then transfer the parchment paper with the pastry on top to a sheet pan when you’re ready to bake.)
Choose which sheet of pastry you will use as the bottom layer, and place it onto the center of the parchment paper.
Take the 9-inch cake pan, flip it upside down onto the center of the puff pastry sheet you are using as the bottom layer. Lightly press it onto the top of the bottom puff pastry sheet – just enough to create a slight indent. Alternatively, you can trace with a table knife (very lightly, without cutting through the pastry) the outside of the cake pan. This gives you a guide for where you are going to be placing your filling and eventually cutting out your pastry. Do the same with the pastry sheet that you will be using as a top layer.
Scramble 1 egg. Then, with a pastry brush, brush the bottom layer of puff pastry just around the inside of the circle, coming in about 2 inches. On the puff pastry sheet you will use as the top layer, do the same thing. On this sheet though, spread the egg wash a little more widely because you’re going to need to flip over this sheet onto the top of the bottom layer of pastry, egg wash to egg wash. It can be hard to get perfect alignment if you only egg wash a tiny circle, and there’s no downside that I know of in painting the egg wash over too much of the top layer of puff pastry.
3. Fill the puff pastry.
Use a small spoon to scoop the filling onto the center of the circle you’ve drawn onto the bottom layer of puff pastry. Spread it out from the center until you’ve reached the egg wash. Don’t venture too far into the egg wash. Smooth the filling so that it is very flat on top, and try to minimize any bubbles in the bottom of the filling. You don’t want air trapped in the filling.
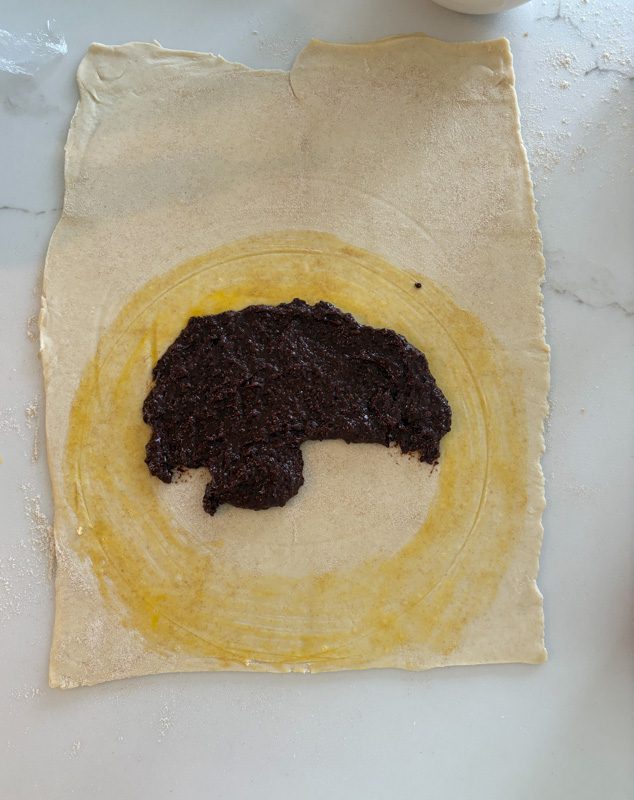
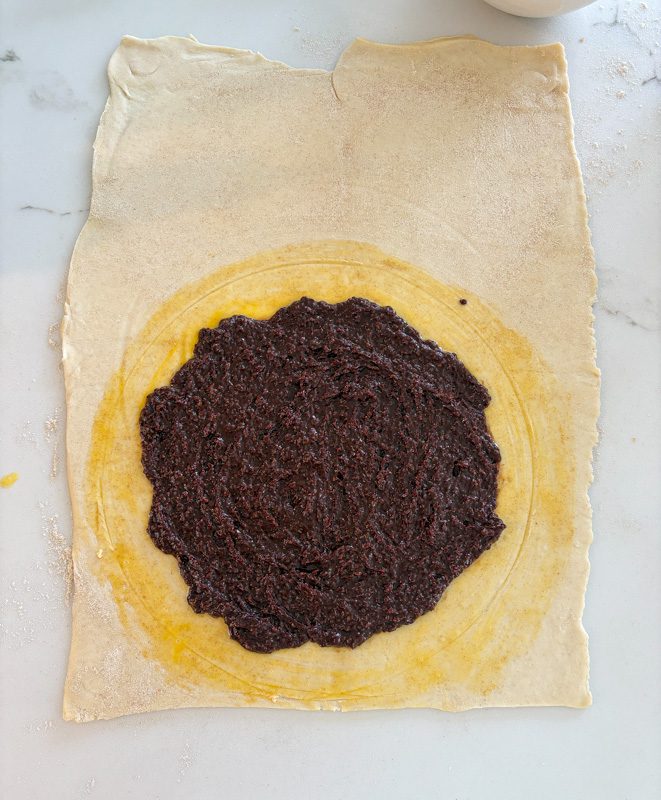
Place the orange rind onto an outer edge of the chocolate filling (you want it as close to the edge as possible, so that you are less likely to cut into it). Keep track of where you placed the rind.

Take the top sheet of puff pastry and flip it upside down onto the bottom sheet of puff pastry, so that the egg wash you painted onto the top sheet matches up with the egg wash you painted on the bottom sheet. Once you’ve flipped over the pastry, try not to move it around, or you risk the filling moving along with the top sheet. Gently smooth the top sheet of puff pastry over the filling to press out any air bubbles in the filling.
Make a tiny mark in the puff pastry where you placed the orange rind. This will serve as a reminder to you of where to be careful to cutting when you cut into the cake.
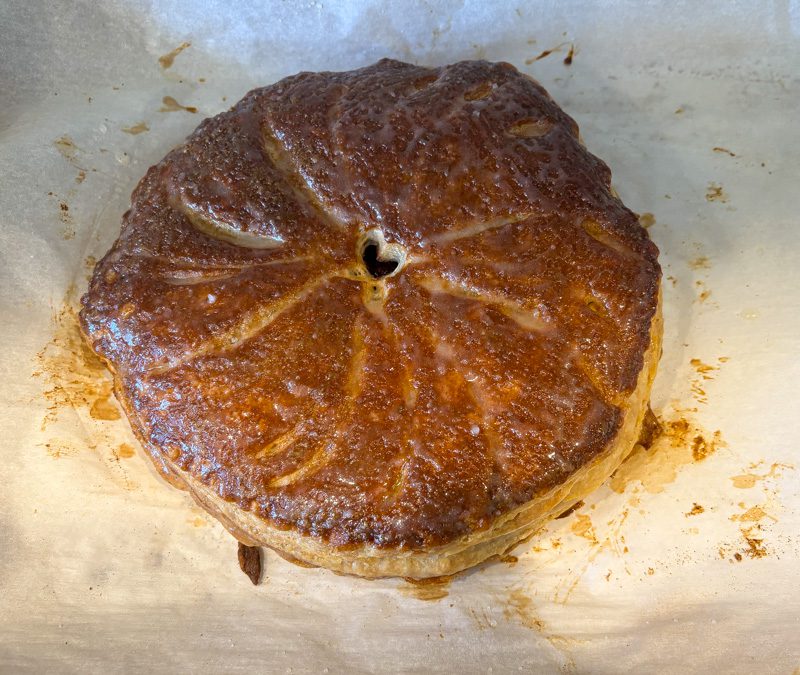
Take the 9-inch cake pan and flip it upside down again over the sheets of puff pastry. Try to make sure the filling is centered as much as possible. Then use a knife to cut through both layers of puff pastry along the outside of the cake pan. You should now have a circle. Cut a very tiny X into the center of the pastry so that the steam from the filling can vent out. The X below is too large (whoops!) — aim for about 1/2 this size.
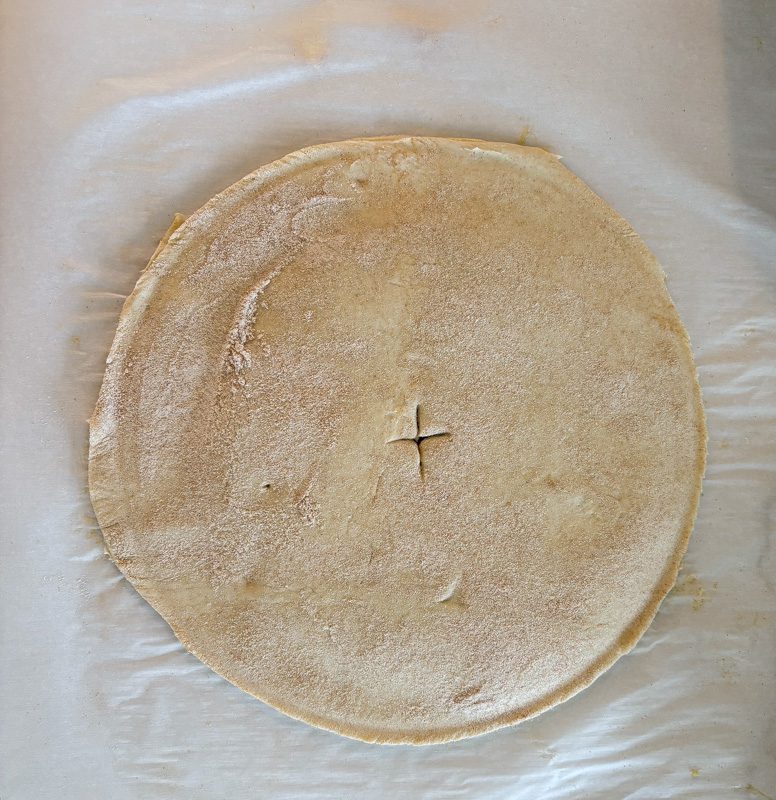
Use your forefinger and thumb to crimp the pastry around the edge to seal in the filling, very gently. You honestly don’t really need to do this step, but it is another measure to ensure you don’t have any filling leakage.
4. Prepare to bake.
Transfer the parchment paper with the cake carefully onto the sheet pan. Brush the top of it with the remaining egg wash.
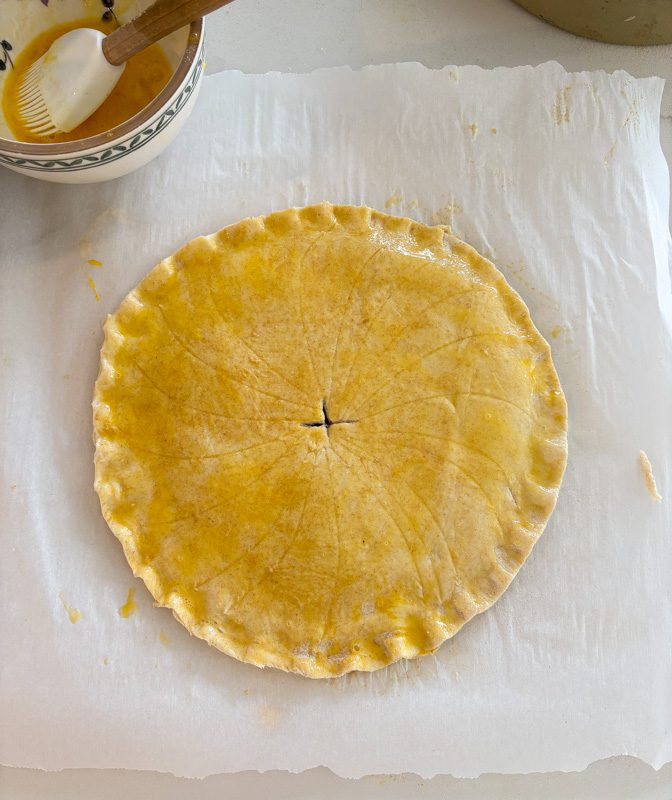
Decorate the pastry top using a paring knife to lightly cut (without piercing all the way through the pastry) little designs into the top layer over the egg wash. I started at the center, and cut little arcs radiating out to the edge.
Place the pastry into the refrigerator for about 20 minutes.
Use this time to preheat the oven to 400F.
5. Bake the pastry.
After the pastry has chilled and the oven is fully preheated, place it in the oven to bake at 400F for 30 minutes. Then reduce the temperature to 350F, and bake for 15 more minutes.
While the pastry bakes, make the glaze. Place the 1/2 cup of sugar and the 1/2 cup of water and the 1 tbsp of butter into a small saucepan over low heat. Stir the sugar syrup until well combined, then turn off the heat.
Once the pastry is finished baking, take it out of the oven and immediately brush it all over with the sugar syrup. This will make it shiny and also help with the natural tendency of puff pastry to get soft over time.
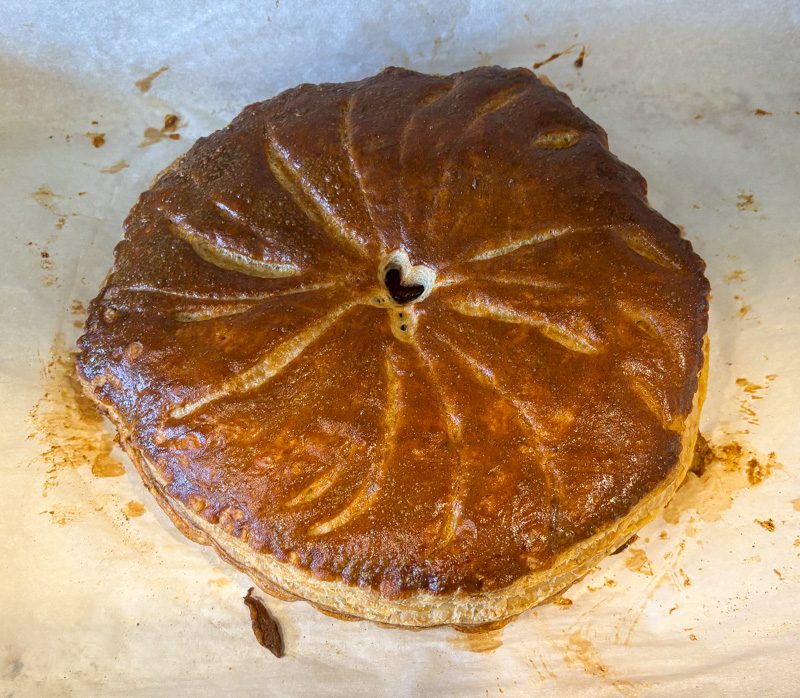
(Above is before brushing with sugar syrup, below is after brushing!)

- Prep Time: 15 min
- Cook Time: 45 min
- Category: Dessert
- Method: Bake

