We call these bright yellow egg noodles straight from my Grandma’s Indiana farm “Grandma’s Noodles.”

(Pictured above: Grandma’s Chicken Noodle Soup)
My grandma’s homemade egg noodles were my favorite childhood comfort food. My grandma would make a huge batch of noodles whenever she’d come out to visit us growing up. It was a favorite tradition. I’d eat loads of them cooked in chicken stock, and my mother was totally cool with it because they had lots of egg!
Now that my grandma’s no longer with us, I’m carrying on the family tradition with my kids and sharing it with you.

How to Make Handmade Egg Noodles
Making egg noodles is extremely straight forward. You basically mix everything together, knead the dough for a couple of minutes, rest it, and then roll it out and cut it into noodles.
You might be saying kneading? No thanks. Yes, this recipe requires 3-5 minutes of kneading. But it’s actually pretty simple, and there are two ways you can approach this: use your hands or use a stand mixer with a dough hook.
My grandmother always did this by hand. She would even mix the ingredients directly on the kitchen counter in a little flour volcano (she’d pour the egg and the milk into the center of the volcano). I find a bowl a little easier to clean, but that’s probably because I still haven’t mastered her technique for mixing directly on the counter in a way that doesn’t result in a massive mess.
How do you knead?
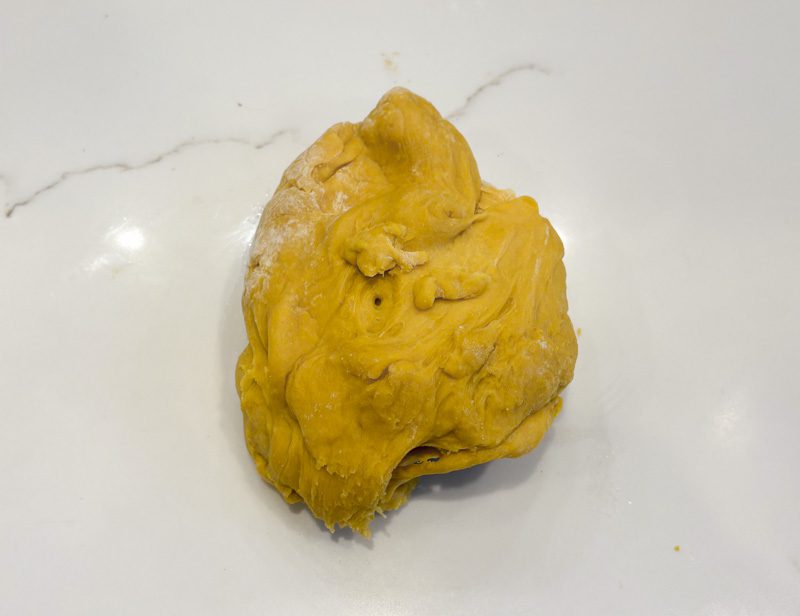
Step 0: Mix ingredients together in a bowl, until they come together and you have a lump of dough.
Step 1: Dust the counter with some flour.
Step 2: Plop your dough directly on top of the freshly dusted counter. If the dough is super sticky, you can dust the top with a bit of flour too. But try not to use more flour than you absolutely need.
Step 3: Pull the side of the dough that is closest to you toward yourself just enough so that you can fold it back into the dough, pressing it down using the palm of your hand. (Note: This is a stiff dough. You are not trying to fold the whole thing over on itself, just move it around a bit at a time. Don’t pull a muscle.)
Step 4: Rotate the dough 30 degrees. Pull the side of the dough closest to you toward yourself again just a bit. Then fold it back into the dough, again pressing it down using the palm of your hand.
Step 5: Continue this folding/rotating (AKA kneading) for 3-5 minutes. The dough should become less sticky over time. If it’s too sticky to work with, dust with flour as needed.
By Hand vs. With a Mixer
When I make these by hand, I typically make only a 1/2 batch. It makes the kneading a bit easier. I also typically knead for closer to 5 minutes, because I take short breaks to do little things around the kitchen (get kids cups of water, deliver toast, etc.) I’m usually doing this while my kids have a snack. It’s a pretty forgiving recipe and gives me something to do other than hover.
If you opt to use a stand mixer, you cannot (and should not try to!) downsize the recipe. If you reduce the size of the recipe, the dough hook may not reach down all the way into the dough to mix/knead. You’ll either end up doing it by hand or doubling the recipe. You do not want to do this. You will not be in a good mood.
Fresh vs. Dried Egg Noodles
There are benefits to making a bigger batch. I usually use about 1/2 of the noodles to make a big batch of soup on the same day I make the noodles. Then I dry the rest of the noodles out over the next 1-2 days to use in the future. It works out pretty well.
Growing up, we usually ate my grandma’s homemade egg noodles dried. My grandma would come out to visit us, make a very large batch, and then she would need to go home. So we’d have lots of noodles after she left. We loved Grandma’s Noodles, both fresh and dry. The only real difference is the cooking time. Obviously, fresh is much faster. I give them 3-5 minutes to cook, depending on how thick I cut them. Dried, they need maybe 10-13 minutes.
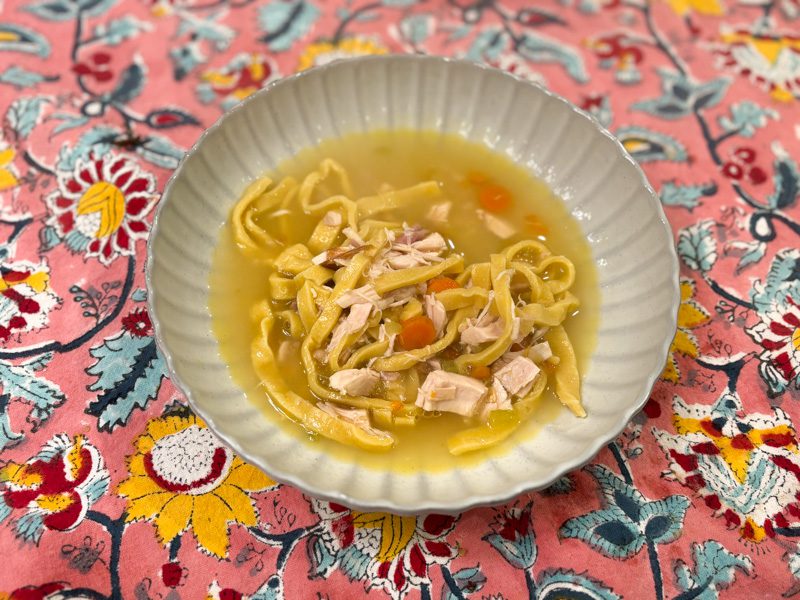
Grandma’s Chicken Noodle Soup Recipe
We usually eat Grandma’s Noodles in chicken noodle soup. The noodles are very hardy and maintain some chew even after they’ve sat in liquid for a while, unlike other egg noodles I’ve tried. This makes them a perfect soup noodle.
I’ll write up a more detailed Grandma’s chicken noodle soup recipe at some point. In the interim, here are the basics. I usually make chicken stock from scratch. (Find the recipe here. It’s super easy; you just need to be around the house for a couple hours and it is so worth it). If you don’t make it from scratch, that’s also fine. Just use chicken stock. I usually use about 6 cups.
Bring the stock to a boil, add some chopped up carrots and celery (I chop them quite small to minimize likelihood of toddlers picking them out), add lots of chopped up cooked chicken (great way to use up leftover chicken!), throw in some noodles, and voila! I could eat it all day long.
We sometimes just have chicken noodle soup with Grandma’s homemade egg noodles for dinner with a vegetable side. Great easy wintertime meal.

Winter School Lunch Hack
We also got a new soup-friendly lunchbox recently. Very big news over here. The kids are still obsessed with them, and since we got them three months ago, it has not yet caused any spills! Despite my daughter not screwing the soup canister lid closed all the way on at least two occasions. (Hooray for two seals!)
Chicken noodle soup with Grandma’s Noodles has been one of my daughter’s lunch favorites this winter. She actually eats it. It’s pretty simple to prepare in the mornings because I make a big batch of chicken noodle soup over the weekend. All I need to do is reheat the soup, pop it into the soup canister, add a fruit side, and lunch is done. I can use it in 2-3 lunches for the week with 0 complaints.
If you’re like me, and you always wait til about 20 minutes before you need to leave the house to make school lunches, this soup plan works out really well. The soup is filling, has protein, vegetables, and starch, and its so quick to heat up and pop into her lunch.
Print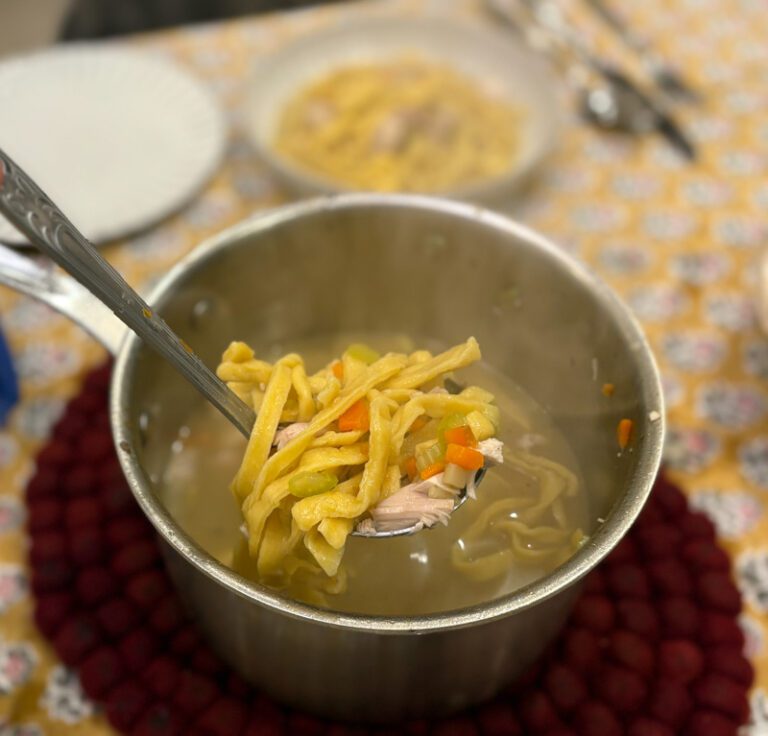
Grandma’s Homemade Egg Noodles
My grandma’s homemade egg noodles were one of my favorite comfort foods growing up. We called them “Grandma’s Noodles.” Super creative, I know.
Whenever she’d come out to visit us from her farm in Indiana, she’d make us a huge batch, and we’d feast like kings. Then we’d run out, and we’d ask my mom how long until she’d come back. (We also really liked her, but her noodles were that good.)
These noodles are my intended game plan as a grandmother. The lady knew what she was doing!
We typically eat these in Grandma’s Chicken Noodle Soup (see basic instructions above) these days. Growing up, my favorite was as soup with just noodles and chicken stock.
Equipment: Rolling pin, cutting board, knife
Optional: Stand mixer with dough hook
Ingredients
3 cups all purpose flour
1 1/4 tsp salt
10 egg yolks
1 egg
6 tbsp milk
Instructions
1. Make the dough & knead for 3-5 minutes.
Add to a mixing bowl (of a stand mixer if using one):
- 3 cups all purpose flour
- 1 1/4 tsp salt
Whisk together. Then add:
- 10 egg yolks
- 1 large egg
- 6 tbsp milk
If mixing by hand: Mix together all of the ingredients until you have a cohesive dough. Then gently knead the dough for about 3-5 minutes. (If you’re unclear on how to knead, see my note above.) It is normal for the dough to feel sticky at first. If it is very, very sticky, add a bit more flour, 1/2 tbsp at a time. You’ve finished kneading when the dough is a cohesive mass and no longer feels sticky.
If mixing with a stand mixer: Do not halve the recipe! (Or the dough hook might not reach the dough.) Mix together all of the ingredients using the stand mixer until you have a cohesive dough, scraping down the sides as needed. After it becomes a cohesive mass, let the mixer knead the dough for a solid 3 minutes on a slow setting. If the dough is not coming together, add a bit more milk (1/2 tbsp at a time). If the dough sticks to the bottom/sides of the bowl, there is a good chance you have too much liquid in there. Add more flour, 1/2 tbsp at a time.
2. Rest the dough for 30 minutes.
After kneading, cover the dough and allow it to rest for 30 minutes to 1 hour. There is no downside in going longer aside from the chance that your noodle dough could dry out a bit. If you’re going to need to go longer than 1 hour, cover the dough with plastic wrap or similar to minimize moisture loss.
Do you need to let it rest? You could probably get away with not resting, but the rest time will make your life easier. The rest time allows the gluten to relax. If the gluten does not relax, when you try to roll out the dough, it will fight you tooth and nail to stay clumped up as a ball. And after you roll it out, it will try to retract back to being in a ball. Because you want to roll it out without having it stick to the surface of the counter, you’re going to use flour, which will only help it achieve it’s goal of reverting to ball shape. Therefore, it is preferable in my experience to work with dough that has had time to chill. (Not literally though, keep it at room temp.)
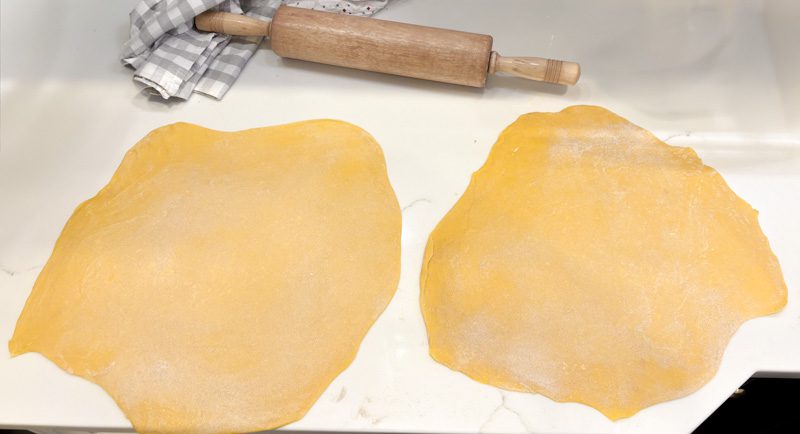
3. Roll out the noodles.
Divide the dough into two portions.
Dust each portion with flour and roll out until 1/8 – 1/16 inch thick, using flour as needed to ensure the sheets do not stick to the rolling pin or the counter surface. I usually do about 5 rolls with the rolling pin, apply a bit of flour to the top, flip over the dough, roll about 5 more times, and repeat the process.
Keep in mind that you are not going for paper thin noodles here. If the noodles are too thin, they will get soggy. I personally prefer them to be nearer to 1/8 of an inch thick so that they have a bit more of a bite to them.
Once both portions of dough are rolled out, set them aside to let them dry out a bit. You can lay them out flat on top of a clean kitchen towel to move them around if needed.
4. Let the noodle sheets dry.
Let them dry out for about 2 hours. Then flip over both sheets and let them dry for 2 more hours.
Ideally you want them to be dry on the surface, but still moist in the middle.
Do you need to dry the sheets? Drying out the dough sheets helps when you roll up the sheets and cut the noodles. You need dry surfaces on the dough sheets so that the noodles don’t stick to themselves when you cut, but you still want the sheets to be pliable so that you can roll them up. If you don’t have time to dry, you can try to compensate by adding more flour to the surface of the dough, but it won’t be as effective as drying and you’ll end up with starchier soup. Or you can cut the noodles by hand without rolling up the sheets (this will take longer and your noodles will be messier.)
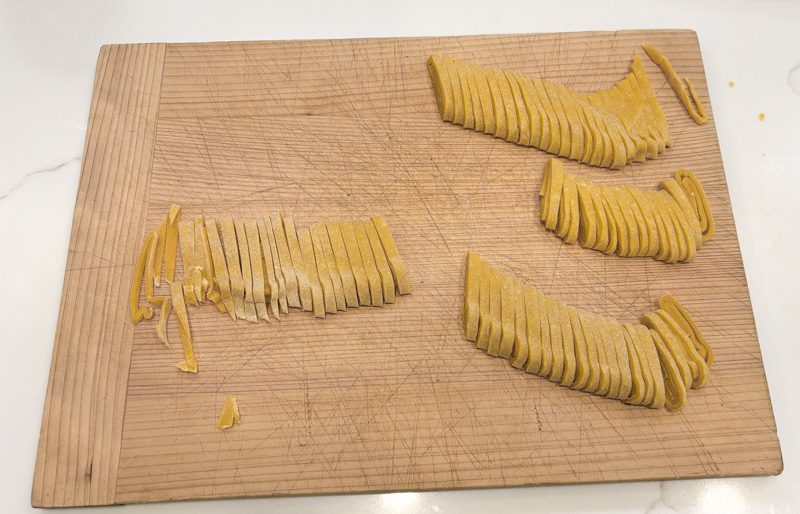
5. Cut the noodles
Prepare a lined baking sheet for your noodles to dry after cutting. I take 1/2 sheet pan and line it with aluminum foil or parchment paper.
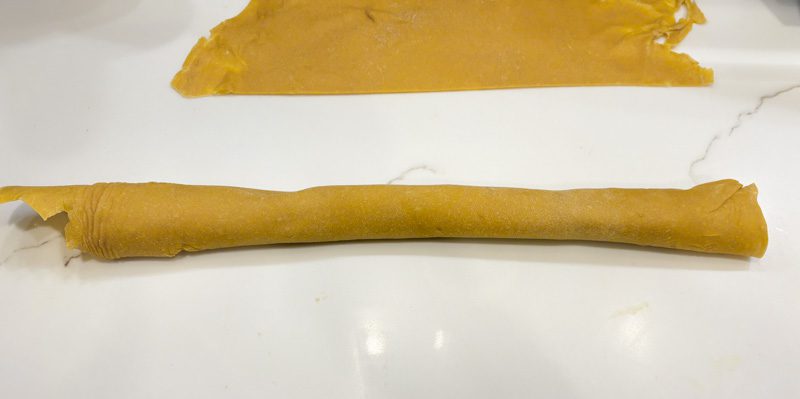
After you’ve finished dried the noodle sheets for about 2 hours (as described above), cut each of the two dough sheets down the middle, so you have a total of 4 sheets. With the longer side of the noodle sheet toward your body, roll up the sheet of noodles (hotdog style – you want a long roll, not a short one, so that you cut lots of relatively short noodles, not a few very long noodles).
Then slice the rolled up noodle sheets so that you have noodles between 1/4 and 1/8 of an inch thick. My sweet spot is about 3/8 of an inch.
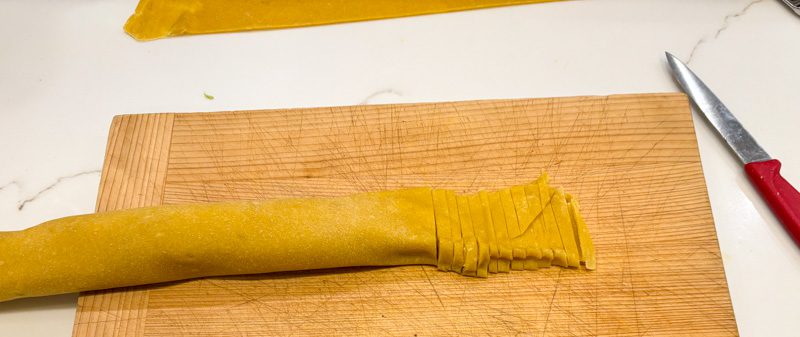
Place the noodles onto the baking sheet and toss them until they become unrolled. I find this is easier to do once I have cut all the noodles – it is easier to toss more noodles than a few.
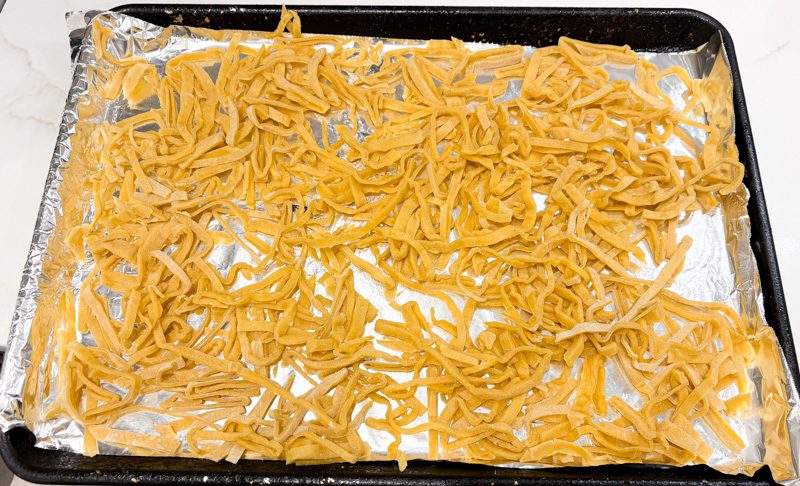
6. Allow the noodles to dry or use immediately.
You can cook the noodles immediately. Cook them for 3-5 minutes depending on thickness.
Alternatively, allow the noodles to dry on the baking sheet. Toss them every 4-5 hours to ensure they fully dry. After about 1-2 days of drying (err on the side of longer), you can store them in an airtight container at room temperature. To cook from dry, they will take about 10-13 minutes, depending on thickness.