. . . I’m an excellent resource for food prep tips because I’m the lazy, squeamish one in our kitchen!
Despite spending a lot of time in the kitchen, I wear rubber exam gloves if I have to touch raw meat. I rarely toss anything in oil (spend precious minutes scrubbing oil off my hands, no thank you). I don’t wash baking sheets more than once a month at most (they hardly fit in the sink and I get soap down my front every time I try), and I would rather pour pasta down the drain than use a colander (who wants to wash a colander?!). So I’ve found a lot of food prep work-arounds.
At the same time, my husband LOVES to research kitchen gear. (We both love to cook.) I don’t gift him a product he hasn’t specifically picked out, because it would deprive him of the pleasure of ordering five different versions of it so that he can trial them all. Between the two of us, we have done a lot of research, and tried many different kitchen tools over the years.
Below are some time-saving food prep tips (including equipment) to enable my fellow lazy and/or squeamish cooks to sauté on.
Food Prep Equipment I Use Daily
1) Oil Spray Bottle
Recommended Product: Olive Oil Spray Bottle

I don’t toss anything in olive oil anymore; I spray it! I use this for literally everything. From spraying frying pans before makking scrambled eggs, to spraying down sheet pans of vegetables (like oven-roasted asparagus) and/or sheet pan bakes and then popping them straight into the oven. I use it on salads and on filo dough. Even on my husband (just kidding, but don’t tell him that because it’s a great threat). We’ve had this one for about 5 years now with no issues. It’s great because the bottle is made of glass (in case you have any concerns about the chemicals in plastics), and the glass is tinted (important for good olive oil). I use it several times a day for cooking, baking, salads, etc.
FYI, in the current edition of this bottle, 4 sprays of olive oil = 1 tsp. The older version of this was 6 sprays = 1 tsp. Yes, I measured. Probably worth double checking for your own reference purposes.
2) Salt Dredge
Recommended Product: Awesome Salt Dredge

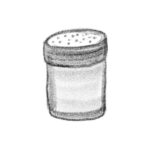
A salt dredge is essentially a very large salt shaker used for cooking. More salt, fewer shakes. Also means the salt flow coming out is a bit more predictable.
We’ve had ours for maybe 5 years now? I use it to salt food while I am cooking literally every day.
3) Tongs
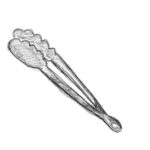
Recommended Product: OXO tongs with silicone heads (9-inch)

We’ve gone through a lot of tongs. We probably have a minimum of 4 sets at any given time, we use them that much. They’re such an easy way to cook food, especially meat. The 9-inch length is perfect for the kitchen (but not the grill). They are safe up to 600F, a higher temp than their nylon tongs which are only safe to 400F. And these are pretty durable. We use them and throw them in the dishwasher pretty much every night without trouble.
4) Garlic Press.
Recommended Product: The Garjet
We use so much garlic in this house. This may be one of the more obvious food prep tips, but any time a recipe calls for minced, sliced, smashed, chopped, etc. garlic, just use a garlic crusher. So much faster and less of a hassle. And your fingers don’t smell like garlic afteward!
We used to have the OXO garlic press, which was great and easy to clean — but then they remade it. Which is bizarre because it already had great reviews and was very popular. Unfortunately the hinges eventually wore out. We tried the new OXO model. It was missing the self-cleaning features that we had loved on the old one – unforgivable!
So the Garjet is my new baby. It smushes the garlic even better than the old OXO model. You don’t need a knife to scrape off the crushed garlic (it has a little lever that does this for you as you open the press back up). And it is so very easy to clean. (I usually just rinse it out well.)
5) Spatulas
Recommended Product: This Set
I use this spatula from Le Creuset both for mixing batters and for cooking eggs, vegetables, etc. in our nonstick pans. I actually use it to scramble eggs directly in the pan (saves a bowl from needing to be washed!) It’s made with high quality silicone. The hard spatula spoon is the best because it is a bit harder (although still flexible) for mixing up firm doughs and meatballs. I also use these for my brown butter pecan cookies. You can buy these together as a set (linked above).
6) Microplaner
Recommended Product: This Microplaner
I use it for cheese, for nutmeg, for lemon zest, for ginger, etc. I reserve our traditional grater for things like carrots or squash or zucchini. It’s so much faster to clean than a box grater, and it doesn’t take up nearly as much storage space.
7) Kitchen Scissors
Recommended Product: OXO Kitchen Scissors
I have four pair of kitchen scissors. I use them for raw meat (discussed below), for cutting herbs, for cutting chicken tenders for the kids, etc. I even carry a pair of shears in my purse for birthday parties. (Please don’t tell 20-year-old me this is how it all ends.)
Baking Equipment
1) Half-Sheet Pans
Recommended Products: Half Sheet; High-Sided Half Sheet
I have 2 half sheets (18 x 13 inches) and one high-sided half sheet.
FYI, a full-size sheet is intended for a commercial oven and measures 26 x 18″. So none of us home cooks really needs that. A half sheet is what most people think of when they think of baking sheets.
Because our family’s been growing, I recently purchased a high-sided half sheet pan to use in lieu of my smaller ceramic or Pyrex pans. It is great for sheet tray bakes or baking meat that is mixed in a marinade. I can line it with parchment paper or aluminum foil and it really simplifies the clean up process. Plus, unlike the ceramic or Pyrex, it can go under the broiler. Also, if you are using a baking rack to cook meat or sweet potato fries, etc., I highly recommend the high-sided sheet pan for that. I’ve found that if you’re using a normal half-sheet with the baking rack, the food can just slide off if you’re not careful. The high-sided pan avoids this issue.
Re cleaning – These sheets can take a lot of abuse. Most nights, I just take off the parchment paper or aluminum foil and don’t clean underneath unless there is sauce or visible oil (if you leave more than a little residue, you will have smoke issues the next time you cook). It just makes life so much easier. Once a month or so, I’ll give them a deeper scrub, but the oil tends to plasticize so there really isn’t too much to clean. I don’t even try to return them to their brand new state.
2) Quarter Sheet Pans
Recommended Product: Quarter Sheet Pan
I also have 2 quarter sheets (13 x 9 inches). A quarter sheet is a small little guy – just big enough to put a 9′ pie tin on or a small amount of food (I use them for asparagus and green beans all the time).
3) Muffin Liners
Recommended Product: Muffin Liners

I love this style. These make my list of kitchen equipment tips for two reasons. First, they enable you to get muffins out of the muffin tray once you have a cooked muffin / cupcake. Even while the muffin is still very hot. You just lift them out by the corners of the paper. No burnt fingers!
Second, the height of the paper makes them very difficult to overfill. Even if you do overfill a bit, the muffin travels up, not onto the muffin tin, resulting in a mess to clean. Makes cleanup of the muffin tin almost unnecessary.
4) Cookie Scoop / Other Batter Scoop
Recommended Product: OXO Cookie Scoop (3 tbsp / Large)
When I bought this, I thought I was buying a bit of a luxury item that I wouldn’t use very much. It’s on my list of kitchen equipment tips now because I use it more than I ever thought I would – for muffins, cookie dough, and meatballs. For muffins especially, it’s great because the scoop ensures they will all be the same size. Plus, it’s so much easier (neater) to get the dough into the muffin tin without making a mess. I use the large, 3 tbsp scoop. For cookies, I make the dough and then scoop it out onto a plate while it is soft and freeze it – so I have perfectly sized (large) cookie dough balls ready to bake.
5) Potato Ricer
Recommended Product: Potato Ricer

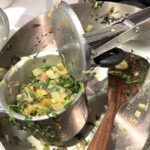
This is a bit more of a niche item, but if you’re really into making spanakopita, you should consider getting a potato ricer. I use it to press the liquid out of my filling, which saves a lot of time. It has a large capacity and, at least so far, has been very durable.
I suppose you could also use it to mash sweet potatoes or pumpkins or regular potatoes, but I haven’t as of now. For me, it’s all about the spanakopita.
6) Tart Pan
Recommended Product: 14 inch x 4.5 Inch Tart Pan

I have several tart pans, including the usual round variety, but this is my most used.
Its rectangular shape makes it incredibly easy to cut slices for people. This is especially the case when you’re working with a crisp crust, delicate crust, or thick crust. It’s just so easy to work with!
7) Immersion Blender (with food processor attachment)
Recommended Product: Braun MultiQuick Immersion Blender
This is the best. It comes with a food processor and whisk attachments. I don’t usually use the whisk, but I use the food processor ALL the time. I barely use my actual food processor (currently languishing somewhere in our basement). I burned out my last immersion blender making chocolate avocado mousse in its food processor attachment, so a major requirement for the new one was a big motor and a slightly larger food processor. This checks both those boxes! And makes making pies (like my honeynut squash pie) a breeze!
For the Squeamish: Oh My God, I’m Touching a Carcass
1) Exam Gloves
Recommended Product: These Gloves
I am a huge baby when it comes to touching raw meat. I’m paranoid about the germs getting under my nails, and I don’t like the smell. My first time preparing a chicken from scratch, I wore gloves and a mask. There’s a glorious and very flattering picture somewhere.
These days I don’t require a mask, but I really do like having gloves around. I use them especially when I handle raw chicken. I feel so much more at ease when I know my hands are not germy from touching a raw chicken, especially if I need to grab a child really quick. I just snap off the gloves. They also make it easy to put a rub on a chicken or a steak.
2) Meat Packaging
Example: Belle & Evans Packaging
Certain meats come in plastic containers that make them much easier to prep. For instance, Bell & Evans tends to do this with their chicken breasts / thighs / etc.
I just open the package up (the plastic top layer just peels back easily), pour over the marinade, move the chicken bits around with a set of tongs to make sure the marinade gets all over the chicken, and I’m done. If it needs to marinade a while, I can put the top plastic layer back down onto the chicken, wrap it in some plastic wrap, and pop it back in the fridge for a while. The tongs go straight into the dishwasher once I’ve finished with them. Easy peasy.
3) Shortcut for Cutting up Raw Chicken
I used to refuse to cook recipes that needed cut-up raw chicken (unless I could get the raw meat pre-cut). I didn’t want to have to deal with the unpleasantness of cutting up raw chicken, etc. The thought of having to clean up a knife, my hands, a cutting board, etc., all contaminated with raw meat juice made the recipe seem about 10x longer and more painful. Ugh.
The shortcut I’ve found is actually really simple. First, I wear rubber exam gloves (see above) and I use a pair of kitchen scissors that break apart for cleaning, not a knife. I try to get chicken that comes in a container like the Belle and Evans container discussed above.
I use this method a lot with boneless, skinless chicken thighs. I just pickup the chicken out of the package and cut it up into several 2-3 inch pieces, and plop them right back down into the container. If I need to mix in a marinade, I do it right in there. So much simpler, and my hands are not gross. And there’s no cutting board. Or knife. I break apart the kitchen scissors when I’m done and put them straight into the dishwasher.
4) Oh, Kitchen Scissors
Recommended Product: OXO Kitchen Scissors
I have four pair of kitchen scissors. I use them for raw meat, for cutting herbs, for cutting chicken tenders for the kids, etc.
This page includes affiliate links.
